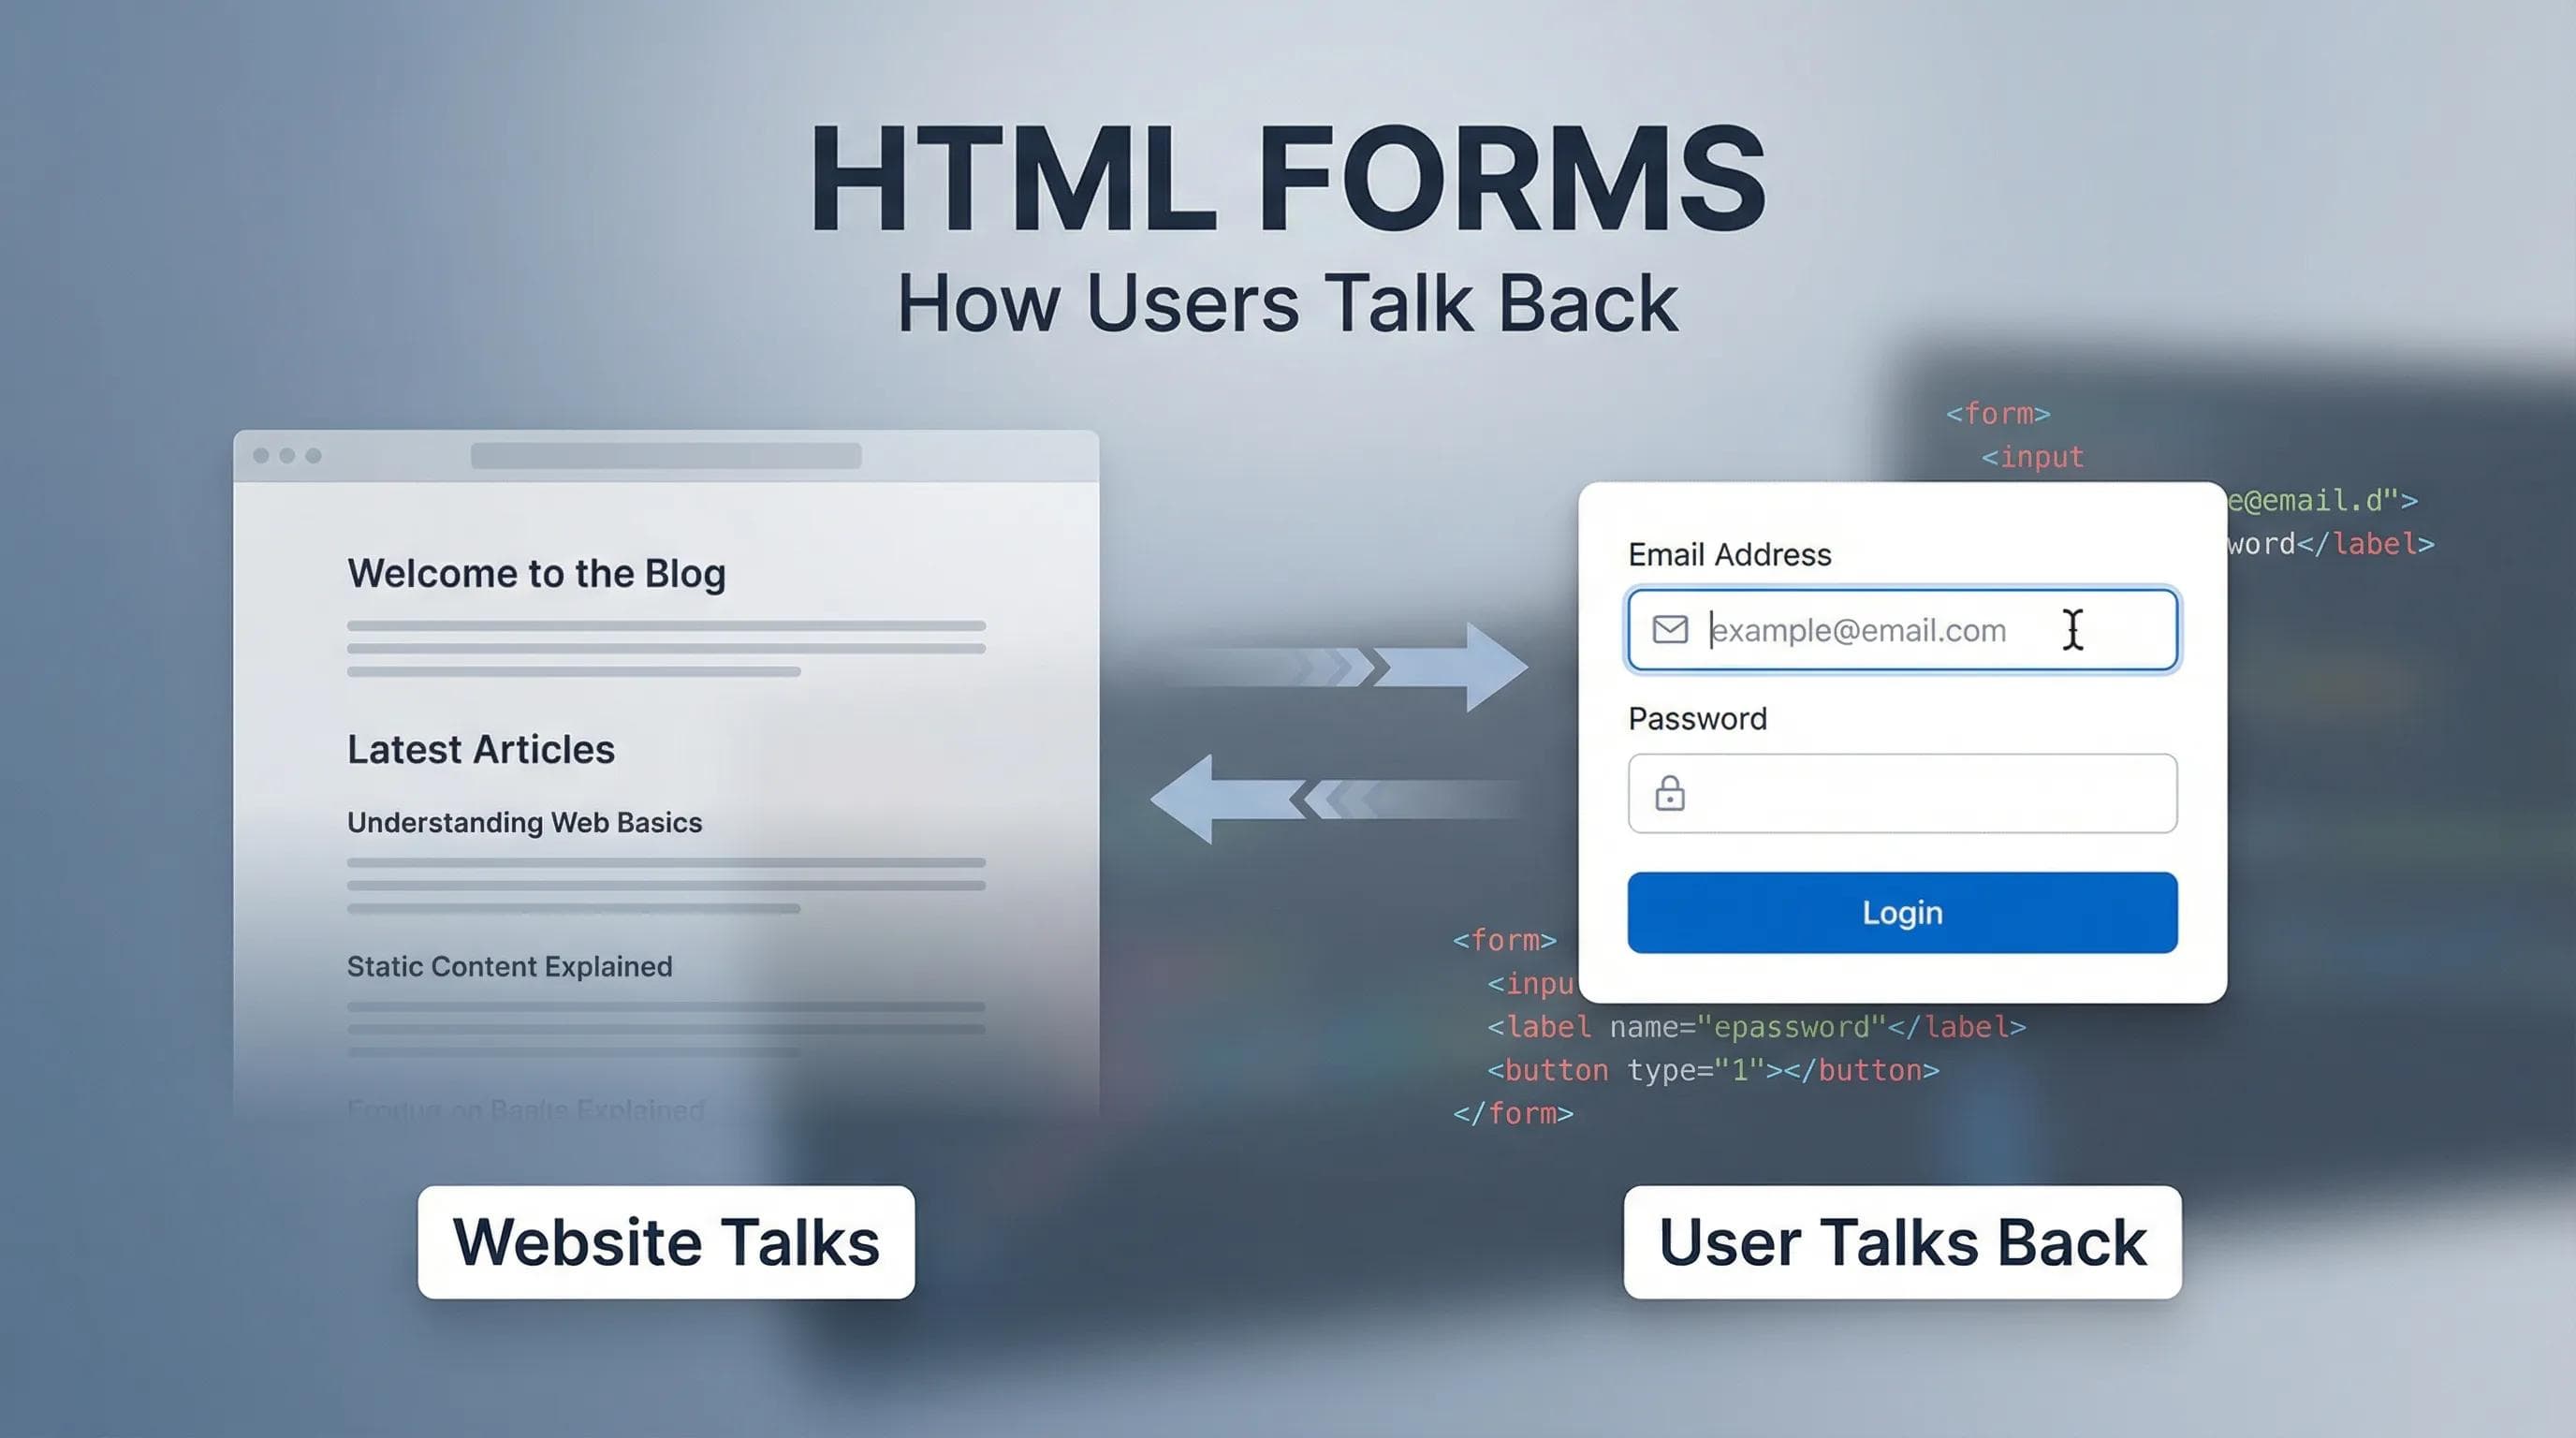
Problem: Our Website is "Mute"
Up until now, the website we built is beautiful, but it has a major flaw. It is a "One-Way Communication."

You (the developer) are speaking, and the User is listening. But what if the user wants to talk back?
- What if they want to Login?
- What if they want to send you a Message?
Right now, they can't.
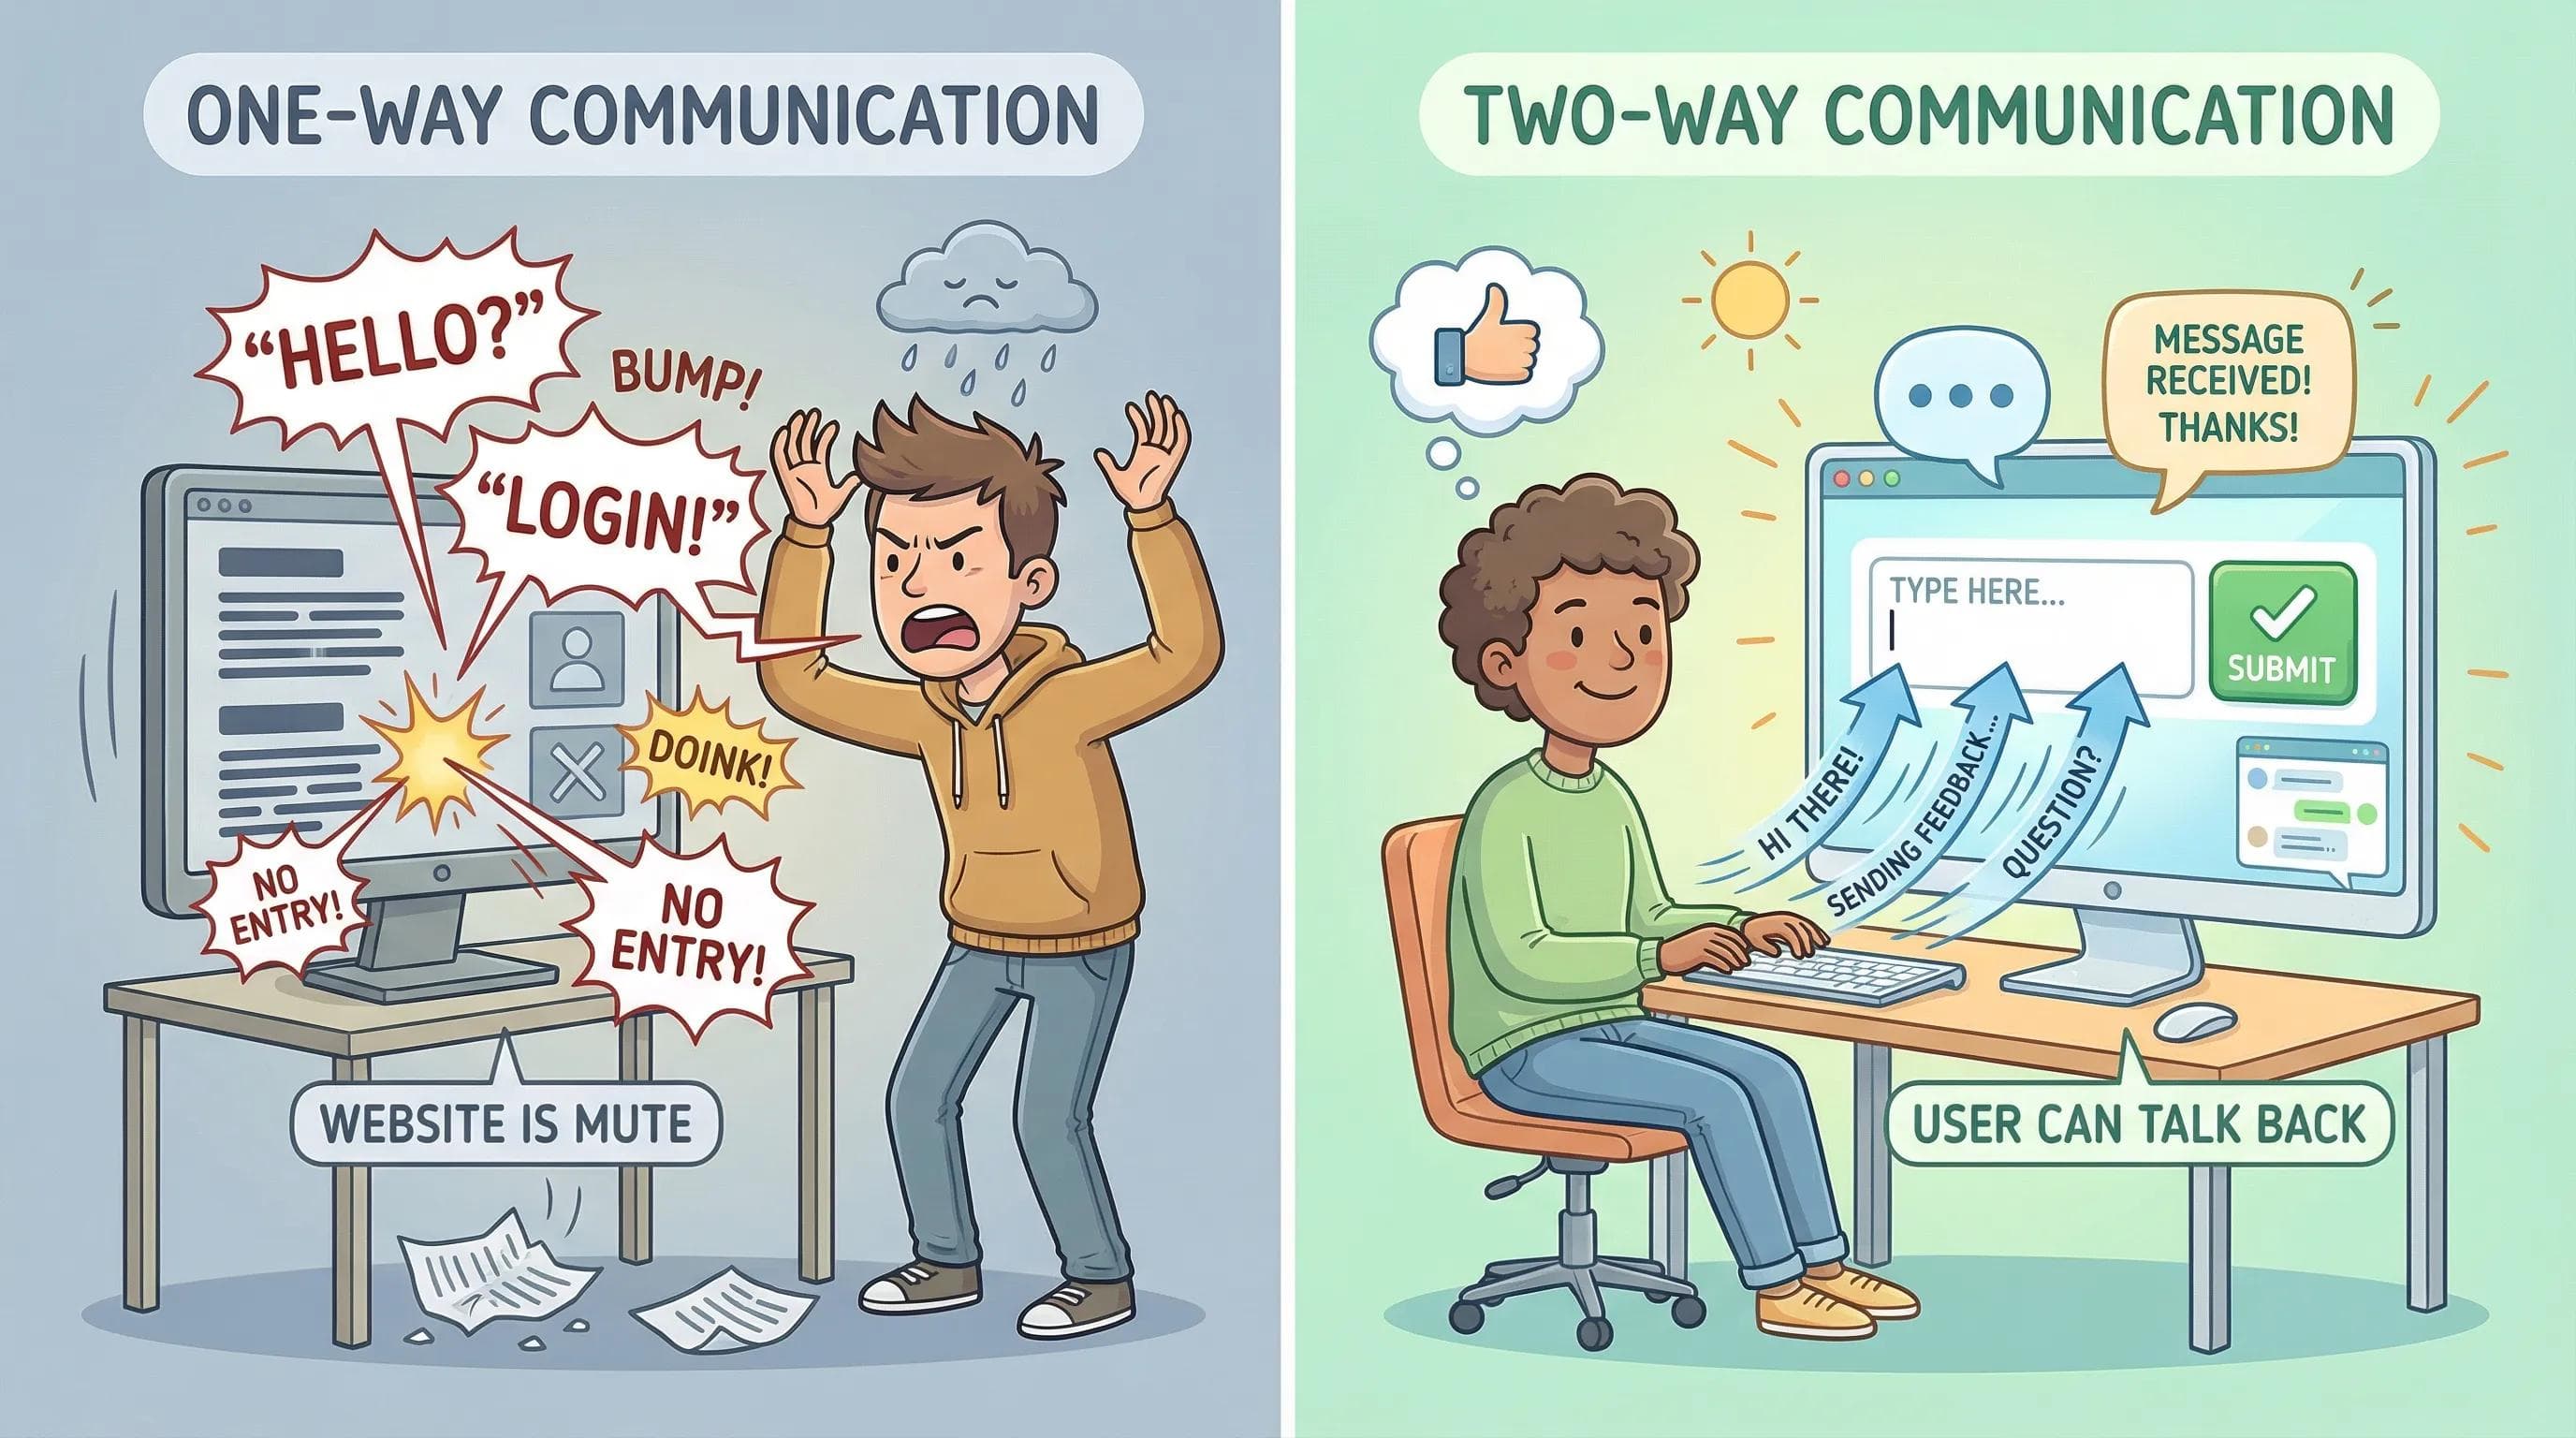
To fix this, we need the most interactive part of HTML: The Form.
In this blog, we will learn how to build the structure that allows users to type, select, and send data to you.
The Container: <form>
Just like a Table needs a
<table> wrapper to hold rows, a Form needs a <form> wrapper to hold input fields.Think of the
<form> tag as an Envelope. If you write a letter (data) but don't put it in an envelope with an address, the postman (browser) won't know where to deliver it.The Two Theoretical Attributes (Interview Questions)
You don't need to memorize these for now as we don't have a backend server yet, but you must know they exist:
Info!
Even though we are focused on the design (Frontend), knowing these two attributes will make you look smart in interviews!
action: "Where should this data go?" (e.g., to a server file likelogin.php).method: "How should we send it?"
The Trinity of Forms (Input, Label, Button)
A form is made of three key players. Let's meet them.
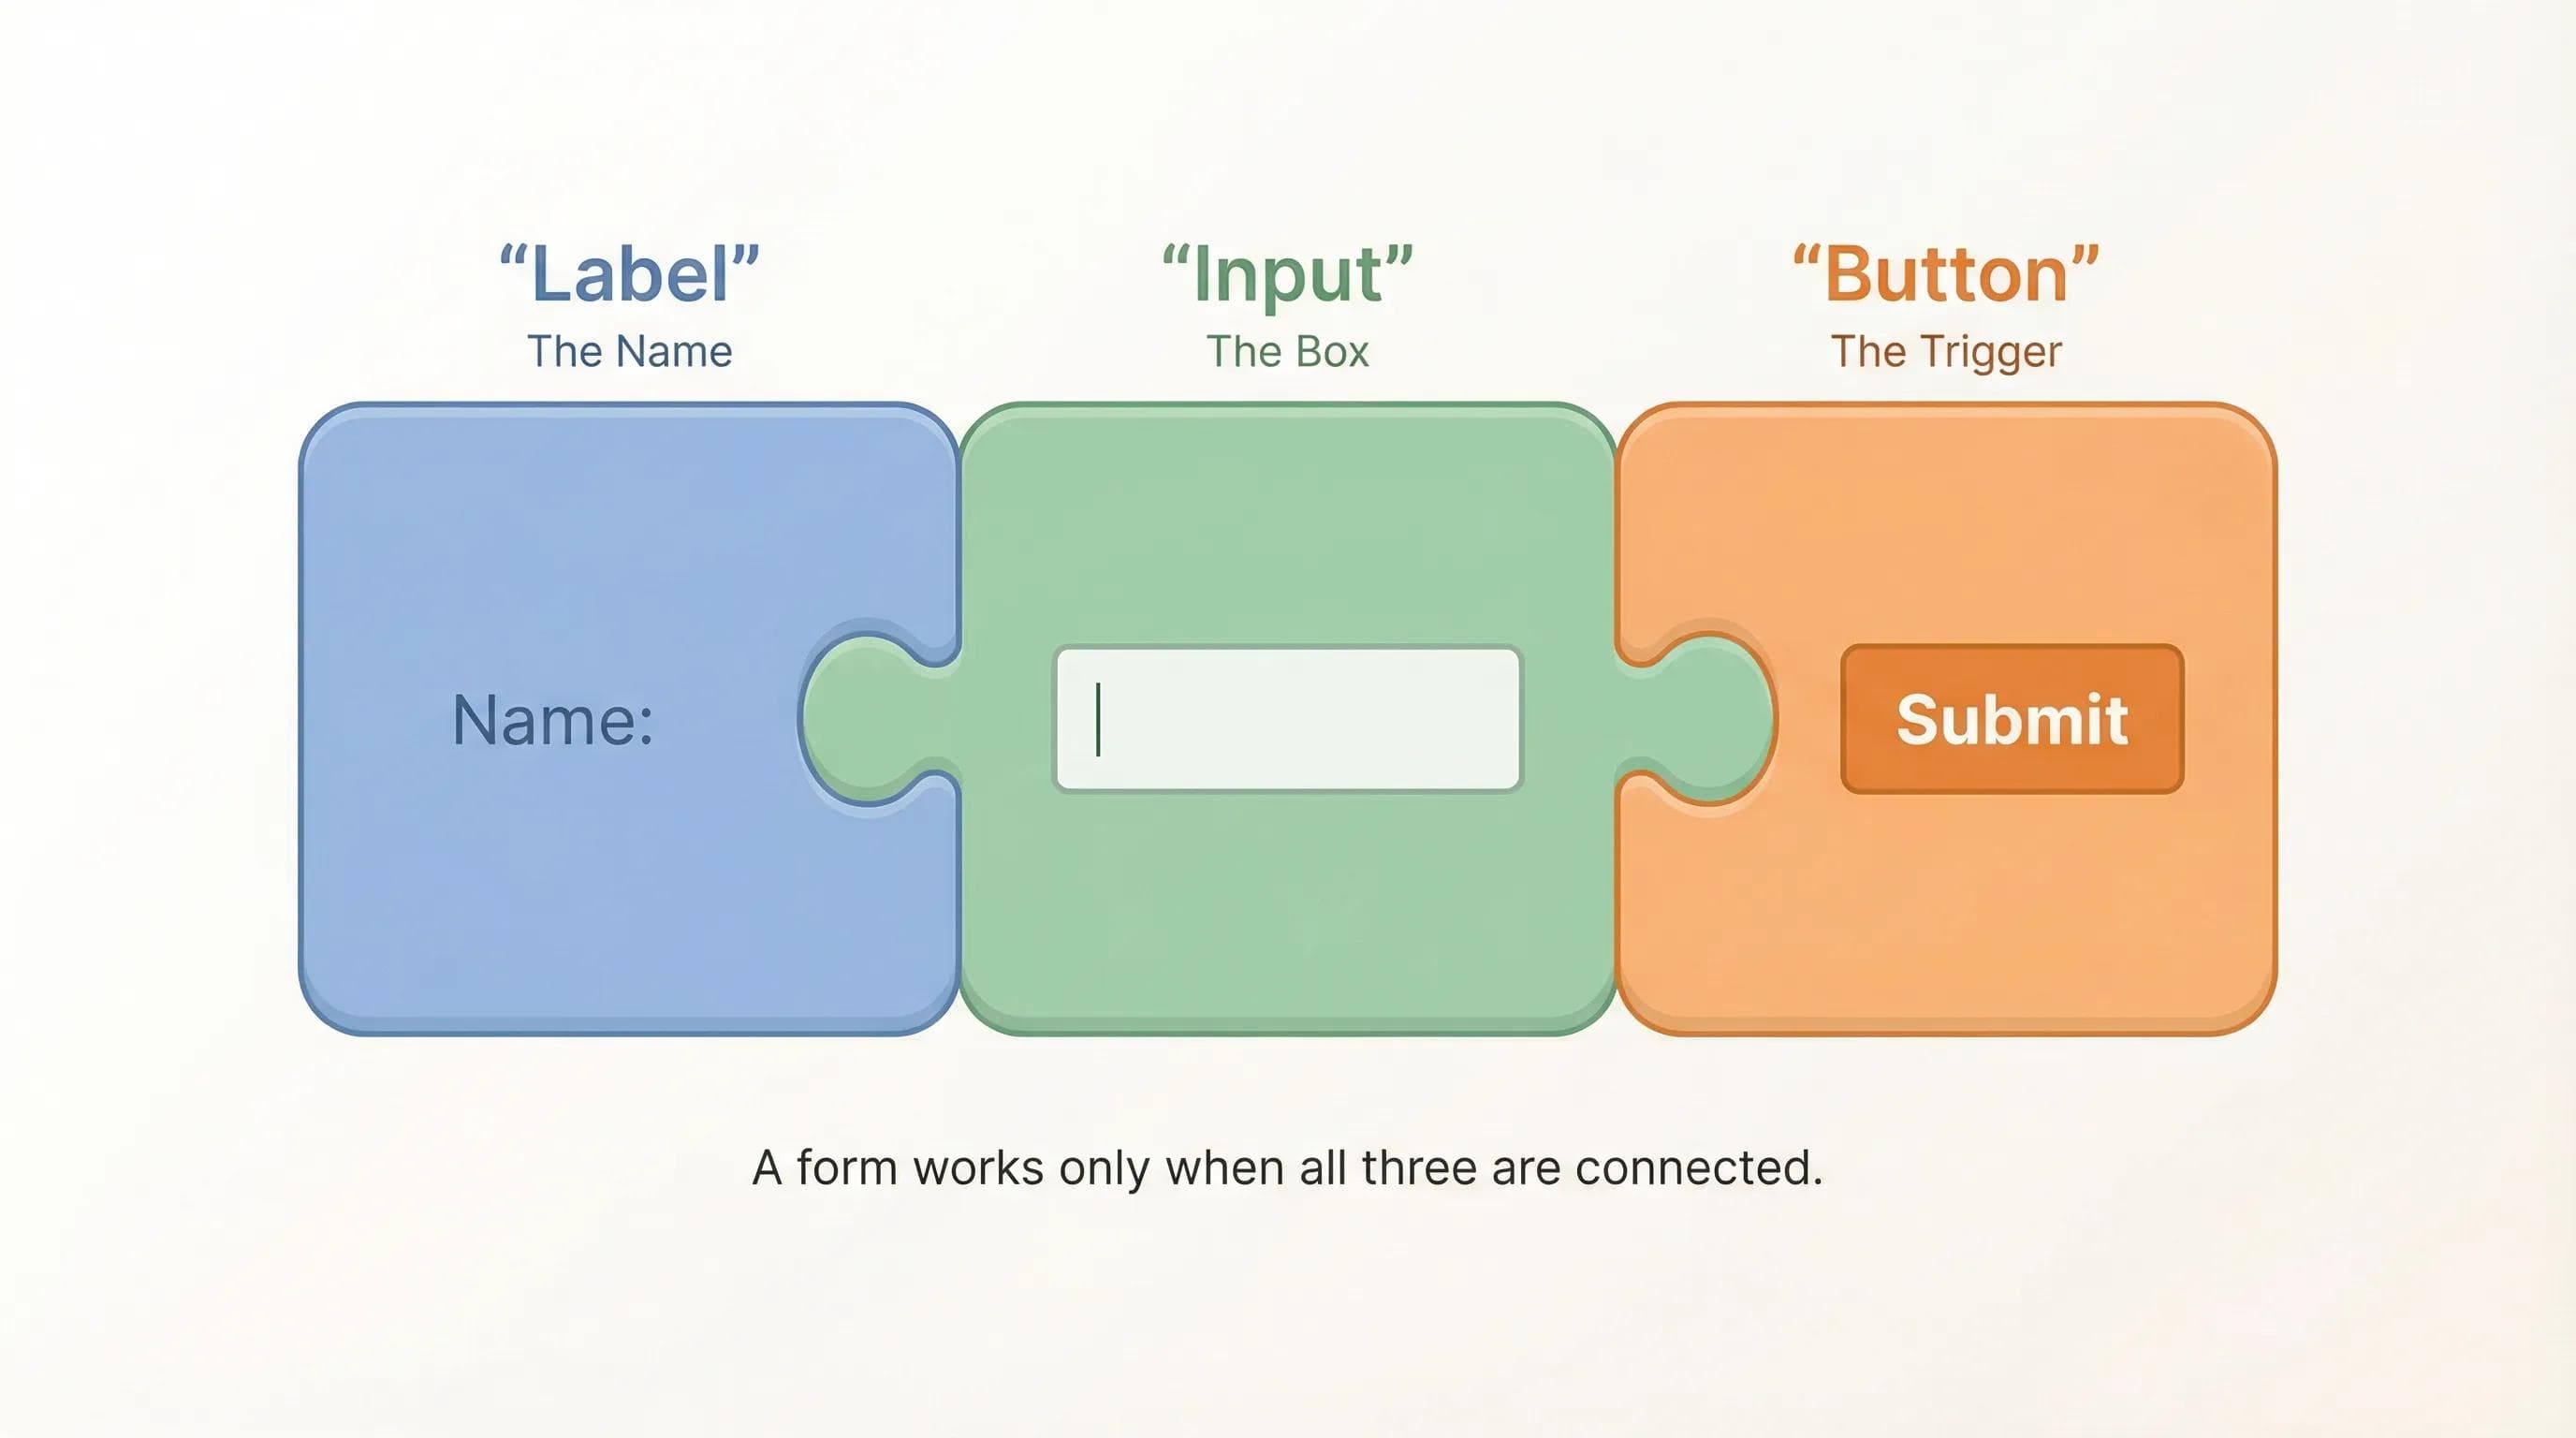
Player 1: The <input> (The Box)
This is where the user types.
The <input> tag is a Void Element (Self-Closing). It does NOT have a closing tag. Correct: <input type="text"> Wrong: <input type="text"></input>
Player 2: The <label> (The Name)
This tells the user what to type. You could just use a paragraph
<p>, but a <label> is special (we will see why in the next section).Player 3: The <button> (The Trigger)
This submits the form.
- Old School:
<input type="submit">(Don't use this much anymore). - Modern Way:
<button type="submit">Submit</button>(Use this. It's flexible because you can put icons or bold text inside it).
Pro Tip: Connecting Label & Input
This is the Secret Sauce of professional developers.
Have you ever clicked on the text "Remember Me" on a login page, and the tiny checkbox next to it got selected automatically? That is because the Developer connected the Label to the Input.
How to connect them? You need to create a link between the
for attribute (in Label) and the id attribute (in Input). They must match exactly.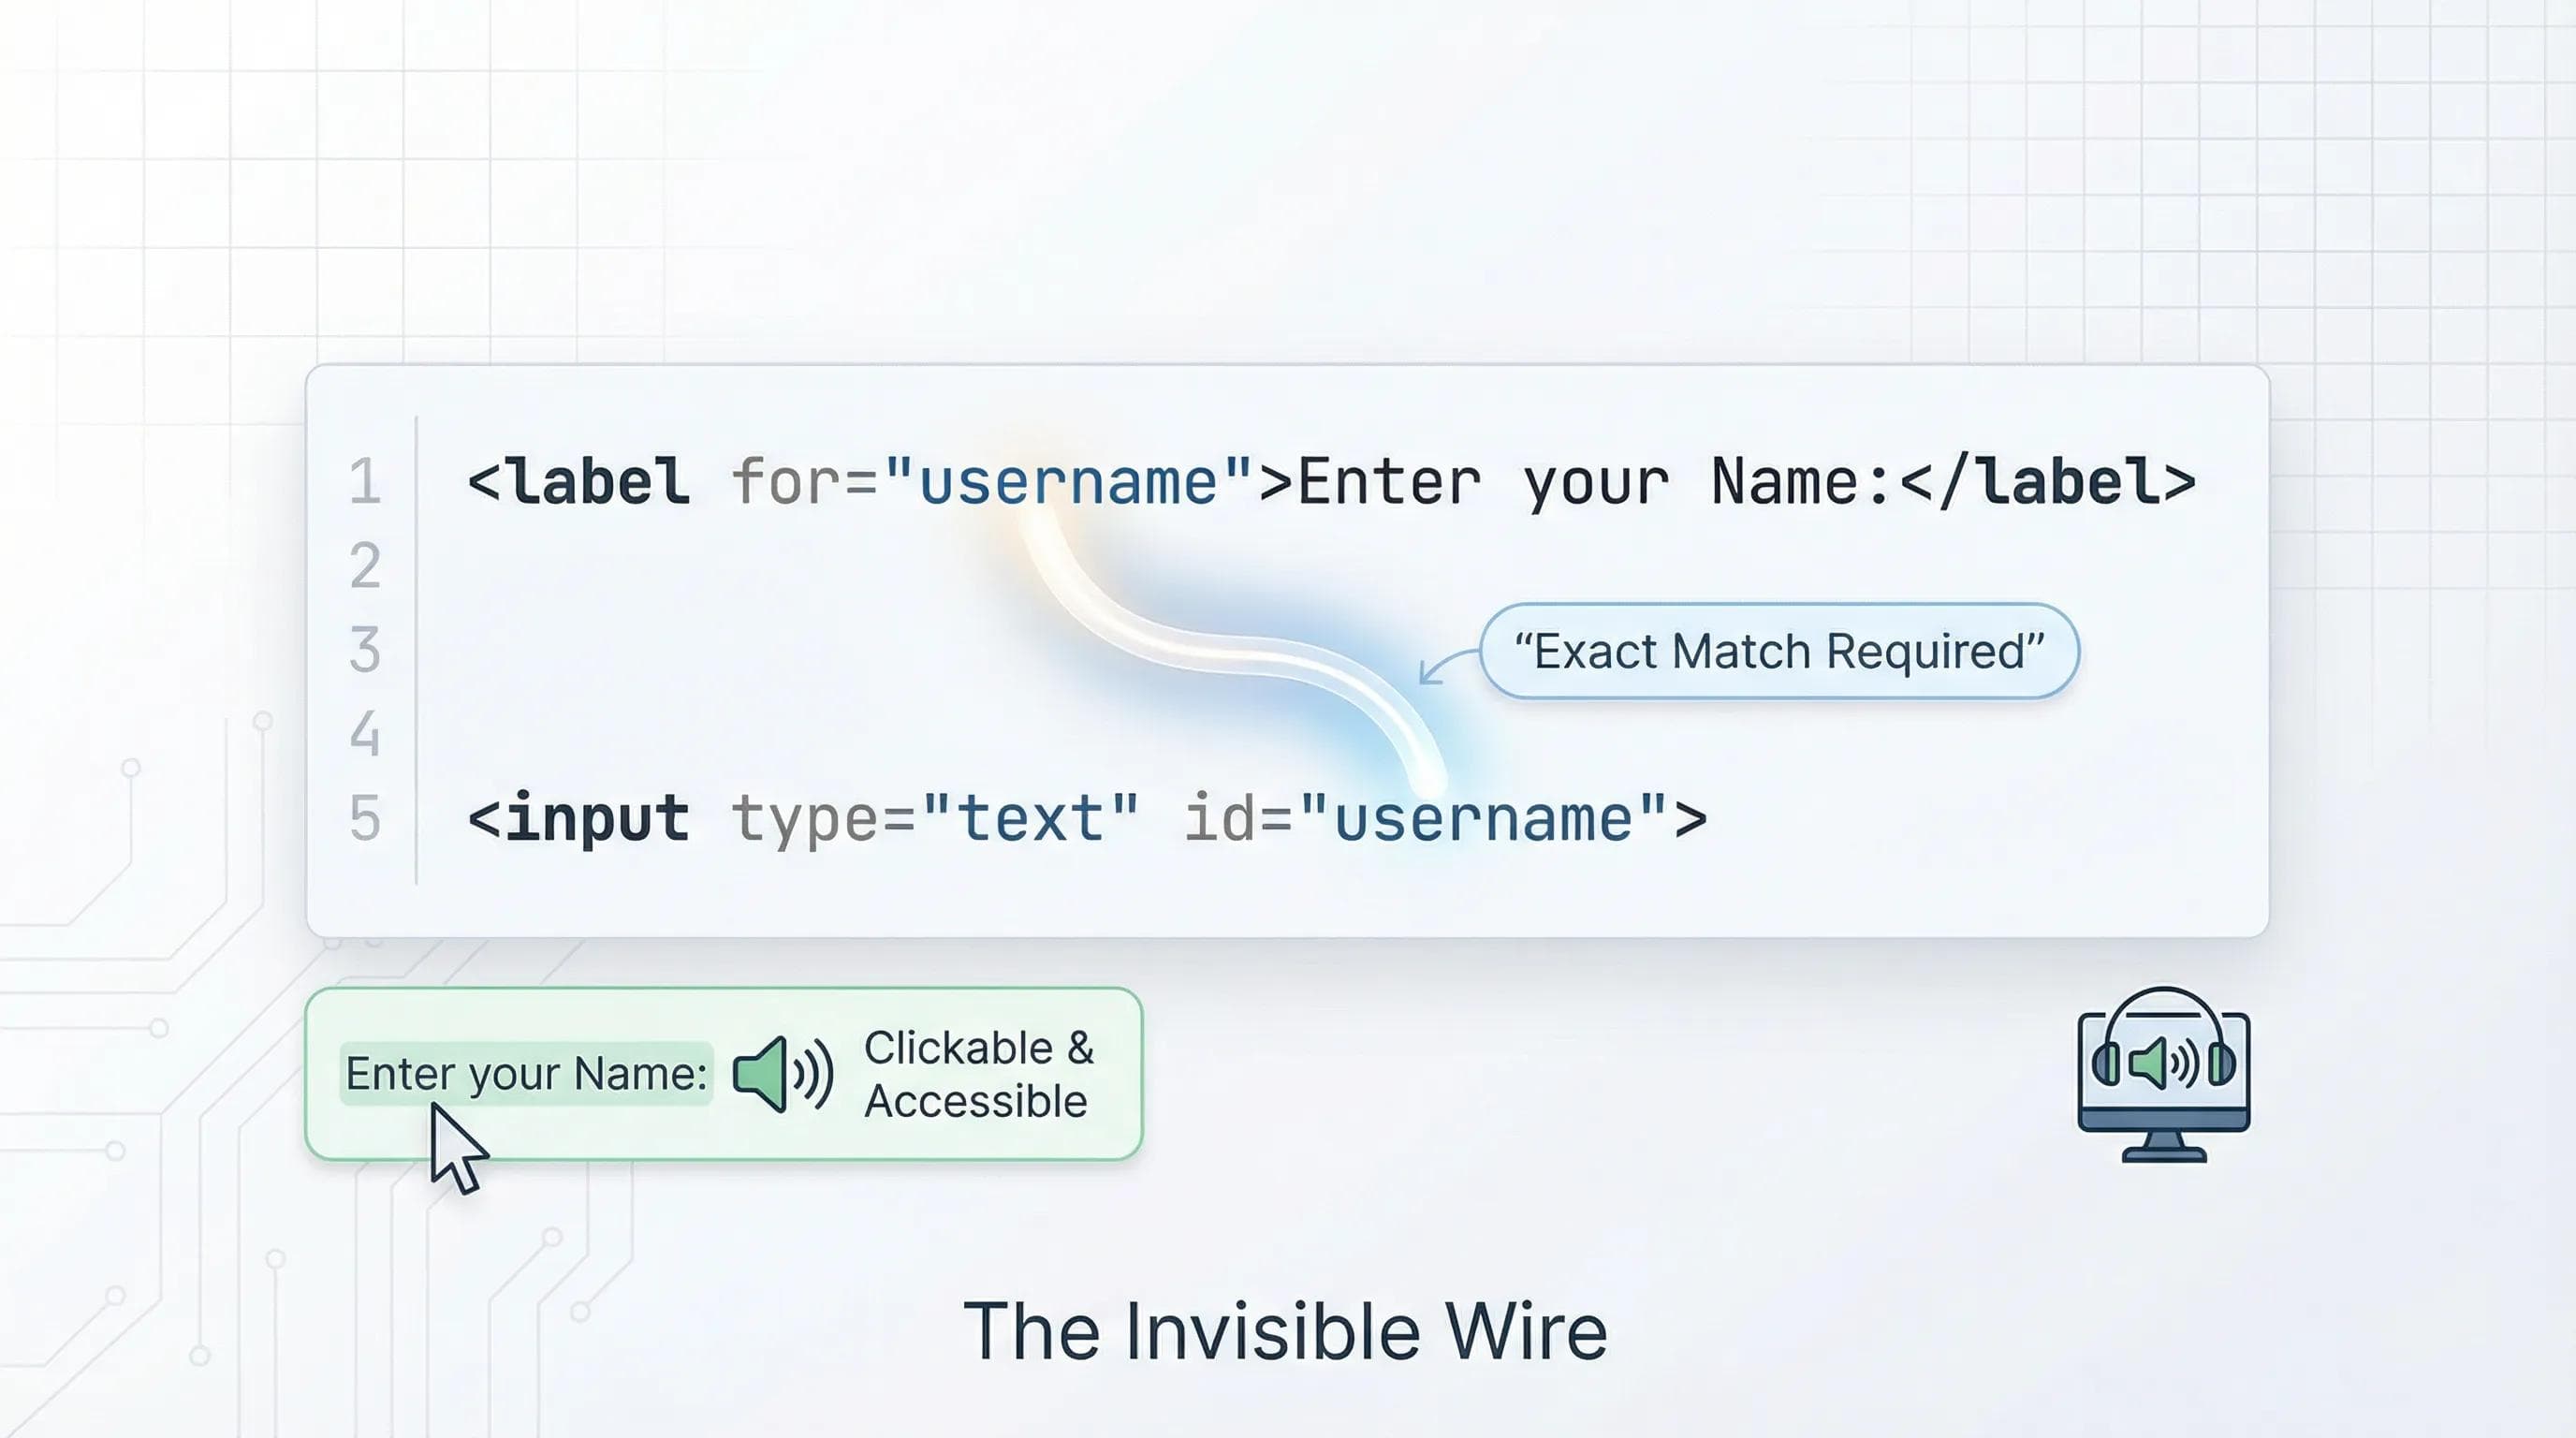
The Syntax:
html
<label for="username">Enter your Name:</label>
<input type="text" id="username">Why is this important?
- UX (User Experience): It increases the "Clickable Area." Users don't have to aim specifically for the tiny input box.
- Accessibility: Screen Readers (for blind users) need this connection to know which label belongs to which input field.
The AI Angle: Don't Be Lazy
AI tools like ChatGPT often forget to add
<label> tags. They might just give you code like this:html
<input type="text" placeholder="Enter Name">While
placeholder (the grey text inside the box) looks nice, it disappears when the user starts typing. If the user forgets what field they were typing in, they have to delete their text to see the hint again.Rule: Always use a visible <label>. AI might skip it, but you shouldn't.Practical Task: Creating a "Contact Me" Page 🛠️
Let's keep our
index.html clean. We will create a new page where users can contact us.STOP! DO NOT COPY PASTE! Reading code is easy. Writing code is hard. Type the code below manually into your VS Code to build muscle memory.
Step 1: Create a new file named
contact.html in your project folder where you have index.html. Step 2: Add the boilerplate (
! + Tab). Step 3: Write this code inside the
<body> tag:html
<h1>Contact Me</h1>
<p>I would love to hear from you!</p>

<form>
    <div>
        <label for="user-name">Your Name:</label>
        <br>
        <input type="text" id="user-name" name="name">
    </div>

    <br>

    <div>
        <label for="user-msg">Your Message:</label>
        <br>
        <textarea id="user-msg" name="message" rows="5" cols="30"></textarea>
    </div>

    <br>

    <button type="submit">Send Message</button>
</form>

<hr>
<a href="index.html">Go Back Home</a>
Step 4: Open
contact.html with Live Server.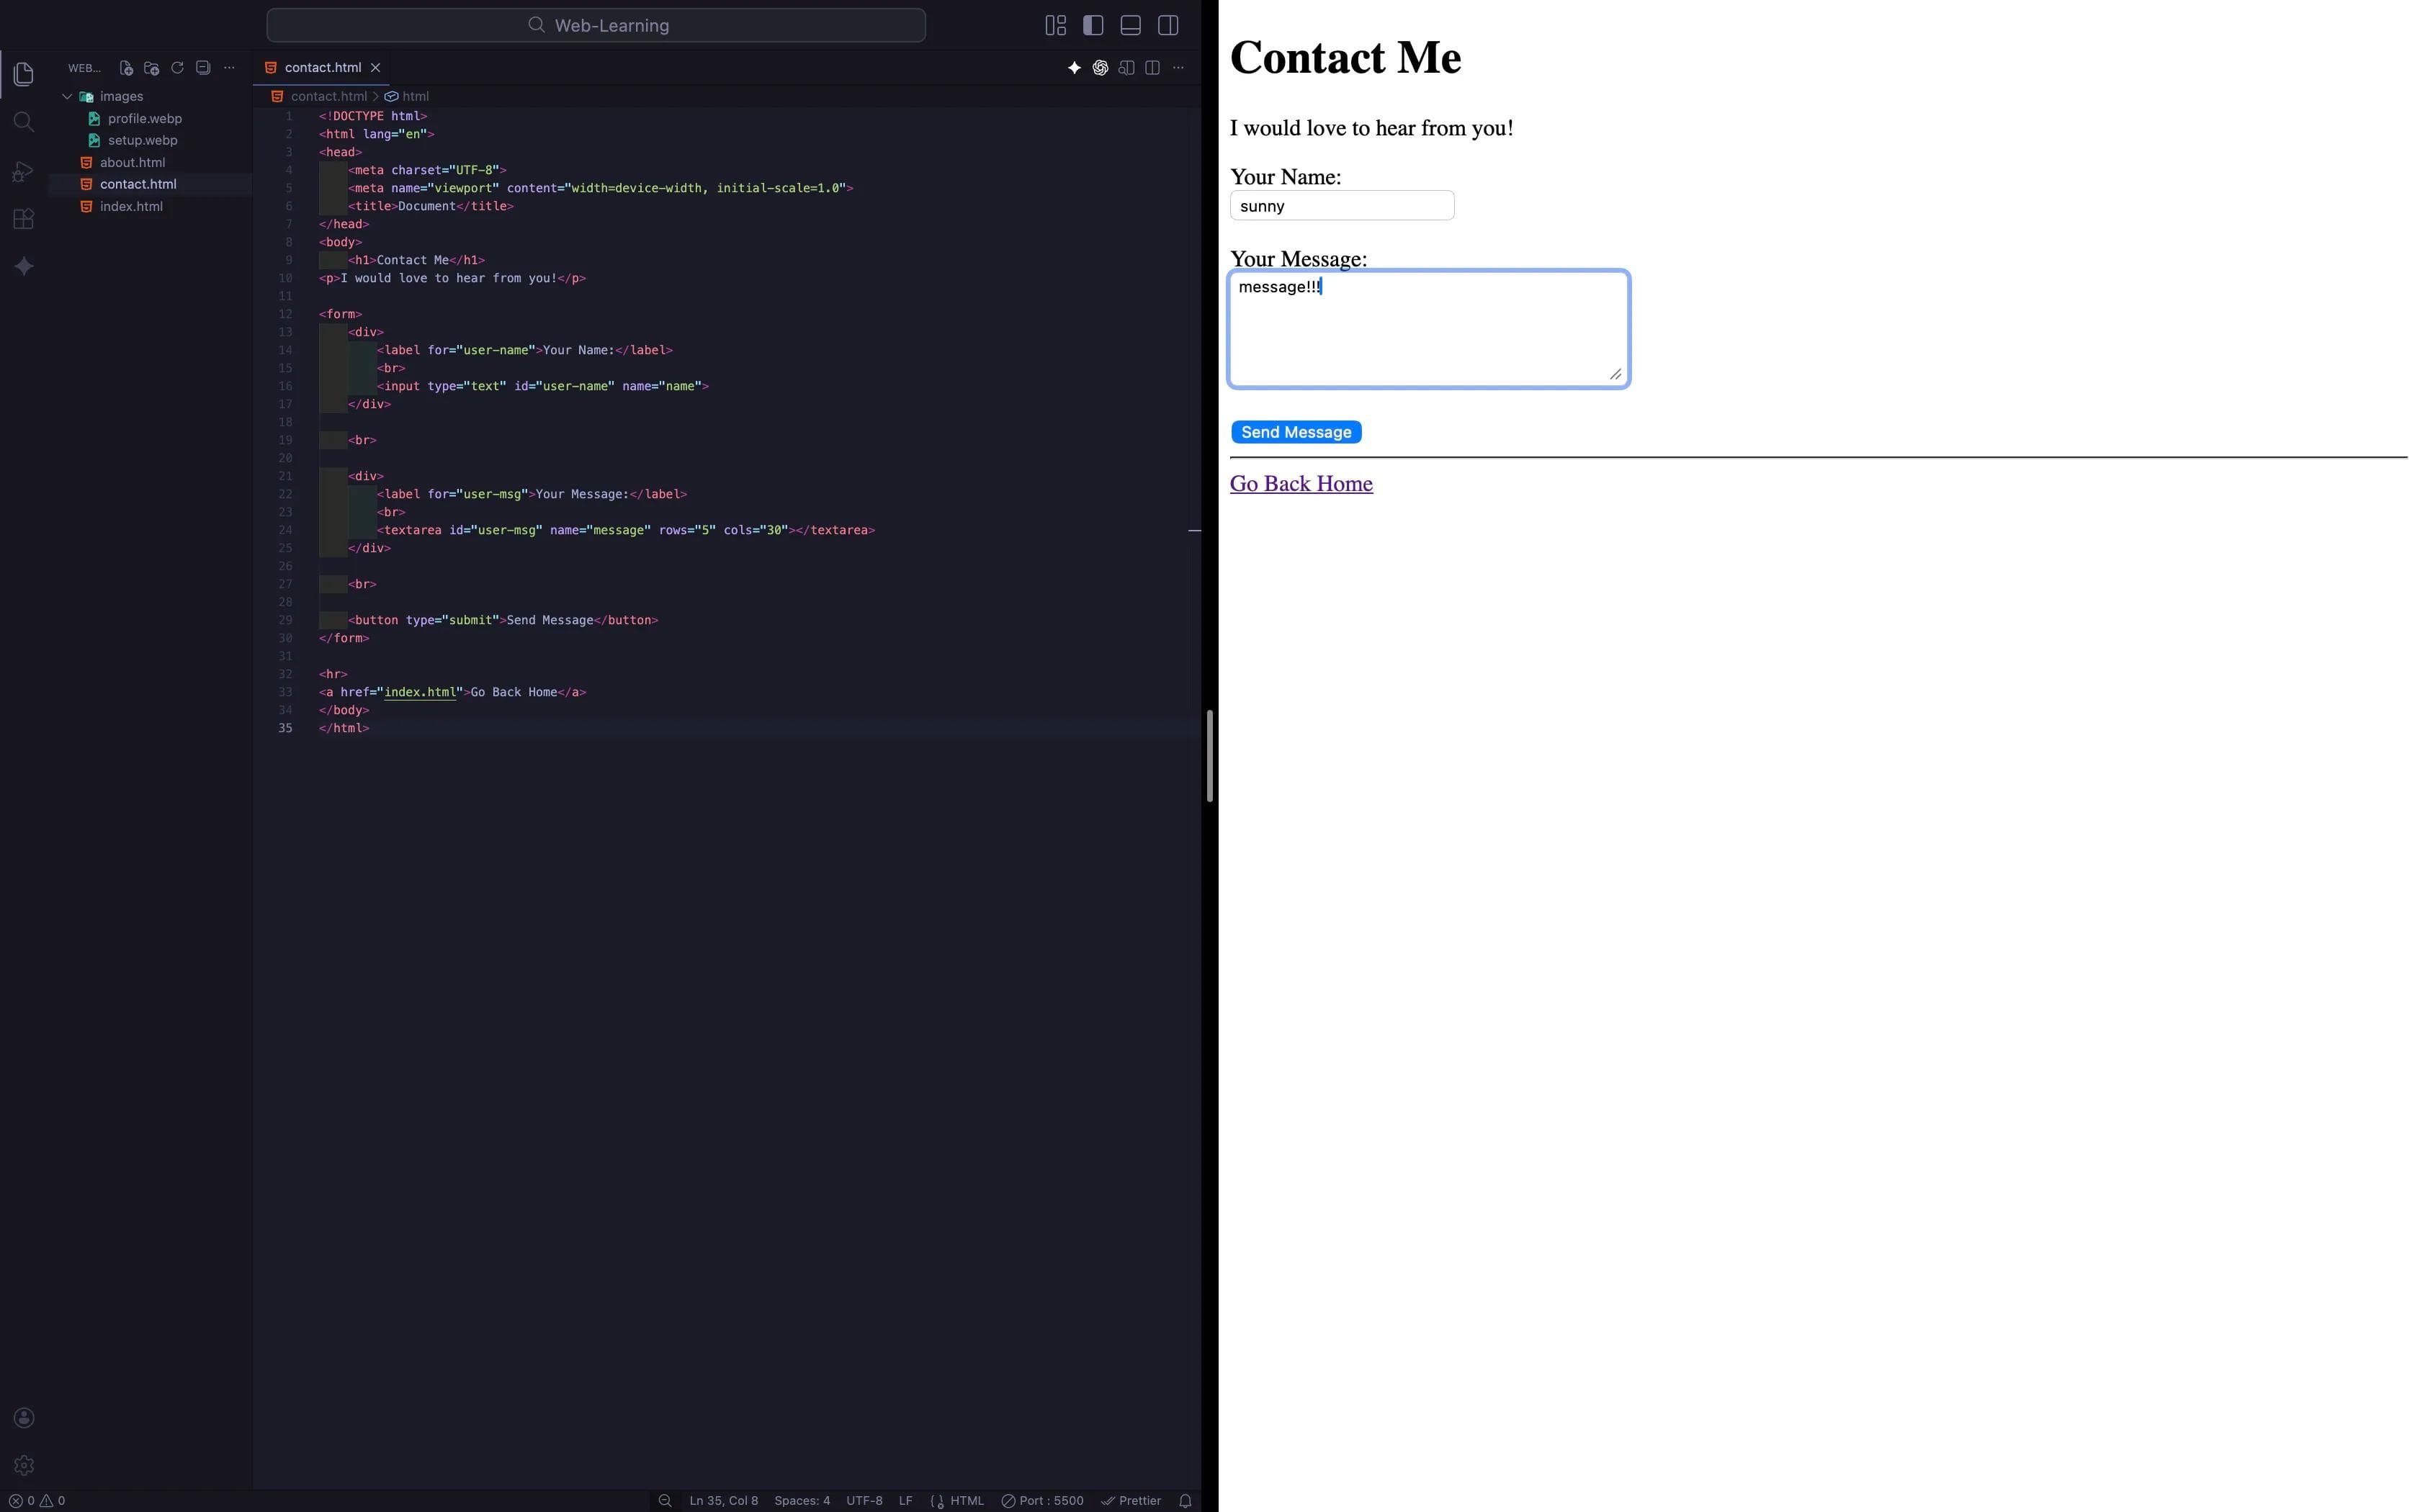
Experiment:
- Click on the text "Your Name:" (Not the box). Does the cursor jump inside the box? If yes, your
forandidare working! - Type something and click "Send Message". You might see the page refresh quickly. That means the form "submitted" (even though it went nowhere).
Common Mistakes to Avoid
Why it matters: When data is eventually sent to a server, the server sees it as key-value pairs (e.g., name=Sunny). If you don't give it a name, the server receives nothing.
Never put a <form> inside another <form>. It is illegal code and will break your layout.
Summary Table: Essential Tags
| Tag | Purpose |
|---|---|
| <form> | The wrapper/container for the whole form. |
| <input> | A single-line text field. |
| <textarea> | A multi-line text field (for big messages/essays). |
| <label> | The title/name of the field (Critical for accessibility). |
| <button> | Submits the data. |
Close the Loop!
Right now, inside your
contact.html, you added a link to go back to Home. That is great. But... imagine a user lands on your Home Page (index.html). How do they find this new Contact page? They can't! You haven't linked it yet.Your Task:
- Open your
index.html. - Find the top Navigation section (where you have the "My Journey" link).
- Add a new link there that points to
contact.html.
I am not going to show you the code for this. You learned about Links (
<a>) in Blog 6. It is time to test your memory.Go ahead, experiment! Try to mix everything you have learned so far. Maybe put the links in a list? Maybe add a small icon? If you get stuck, don't rush to ask AI. Look at your previous code. Trust your brain.
Conclusion
You have successfully built the skeleton of a "Contact Us" page. You now have a Name field and a Message box.
But wait... what if you want to ask for a Password? You don't want the text to be visible. What if you want to ask for their Birth Date? What if you want to ask for their Email and ensure they actually type an
@ symbol?HTML is smarter than you think. It has built-in validators for all of these.
In the next blog post, "Mastering Input Types," we will explore the magic of
type="password", type="date", and the confusing battle between Checkbox vs. Radio Buttons.See you in the next post!
You can Read next part from here - READ NOW!
HTML Series: Your First Step in Modern Web Development (2026)
Step 11 of 22