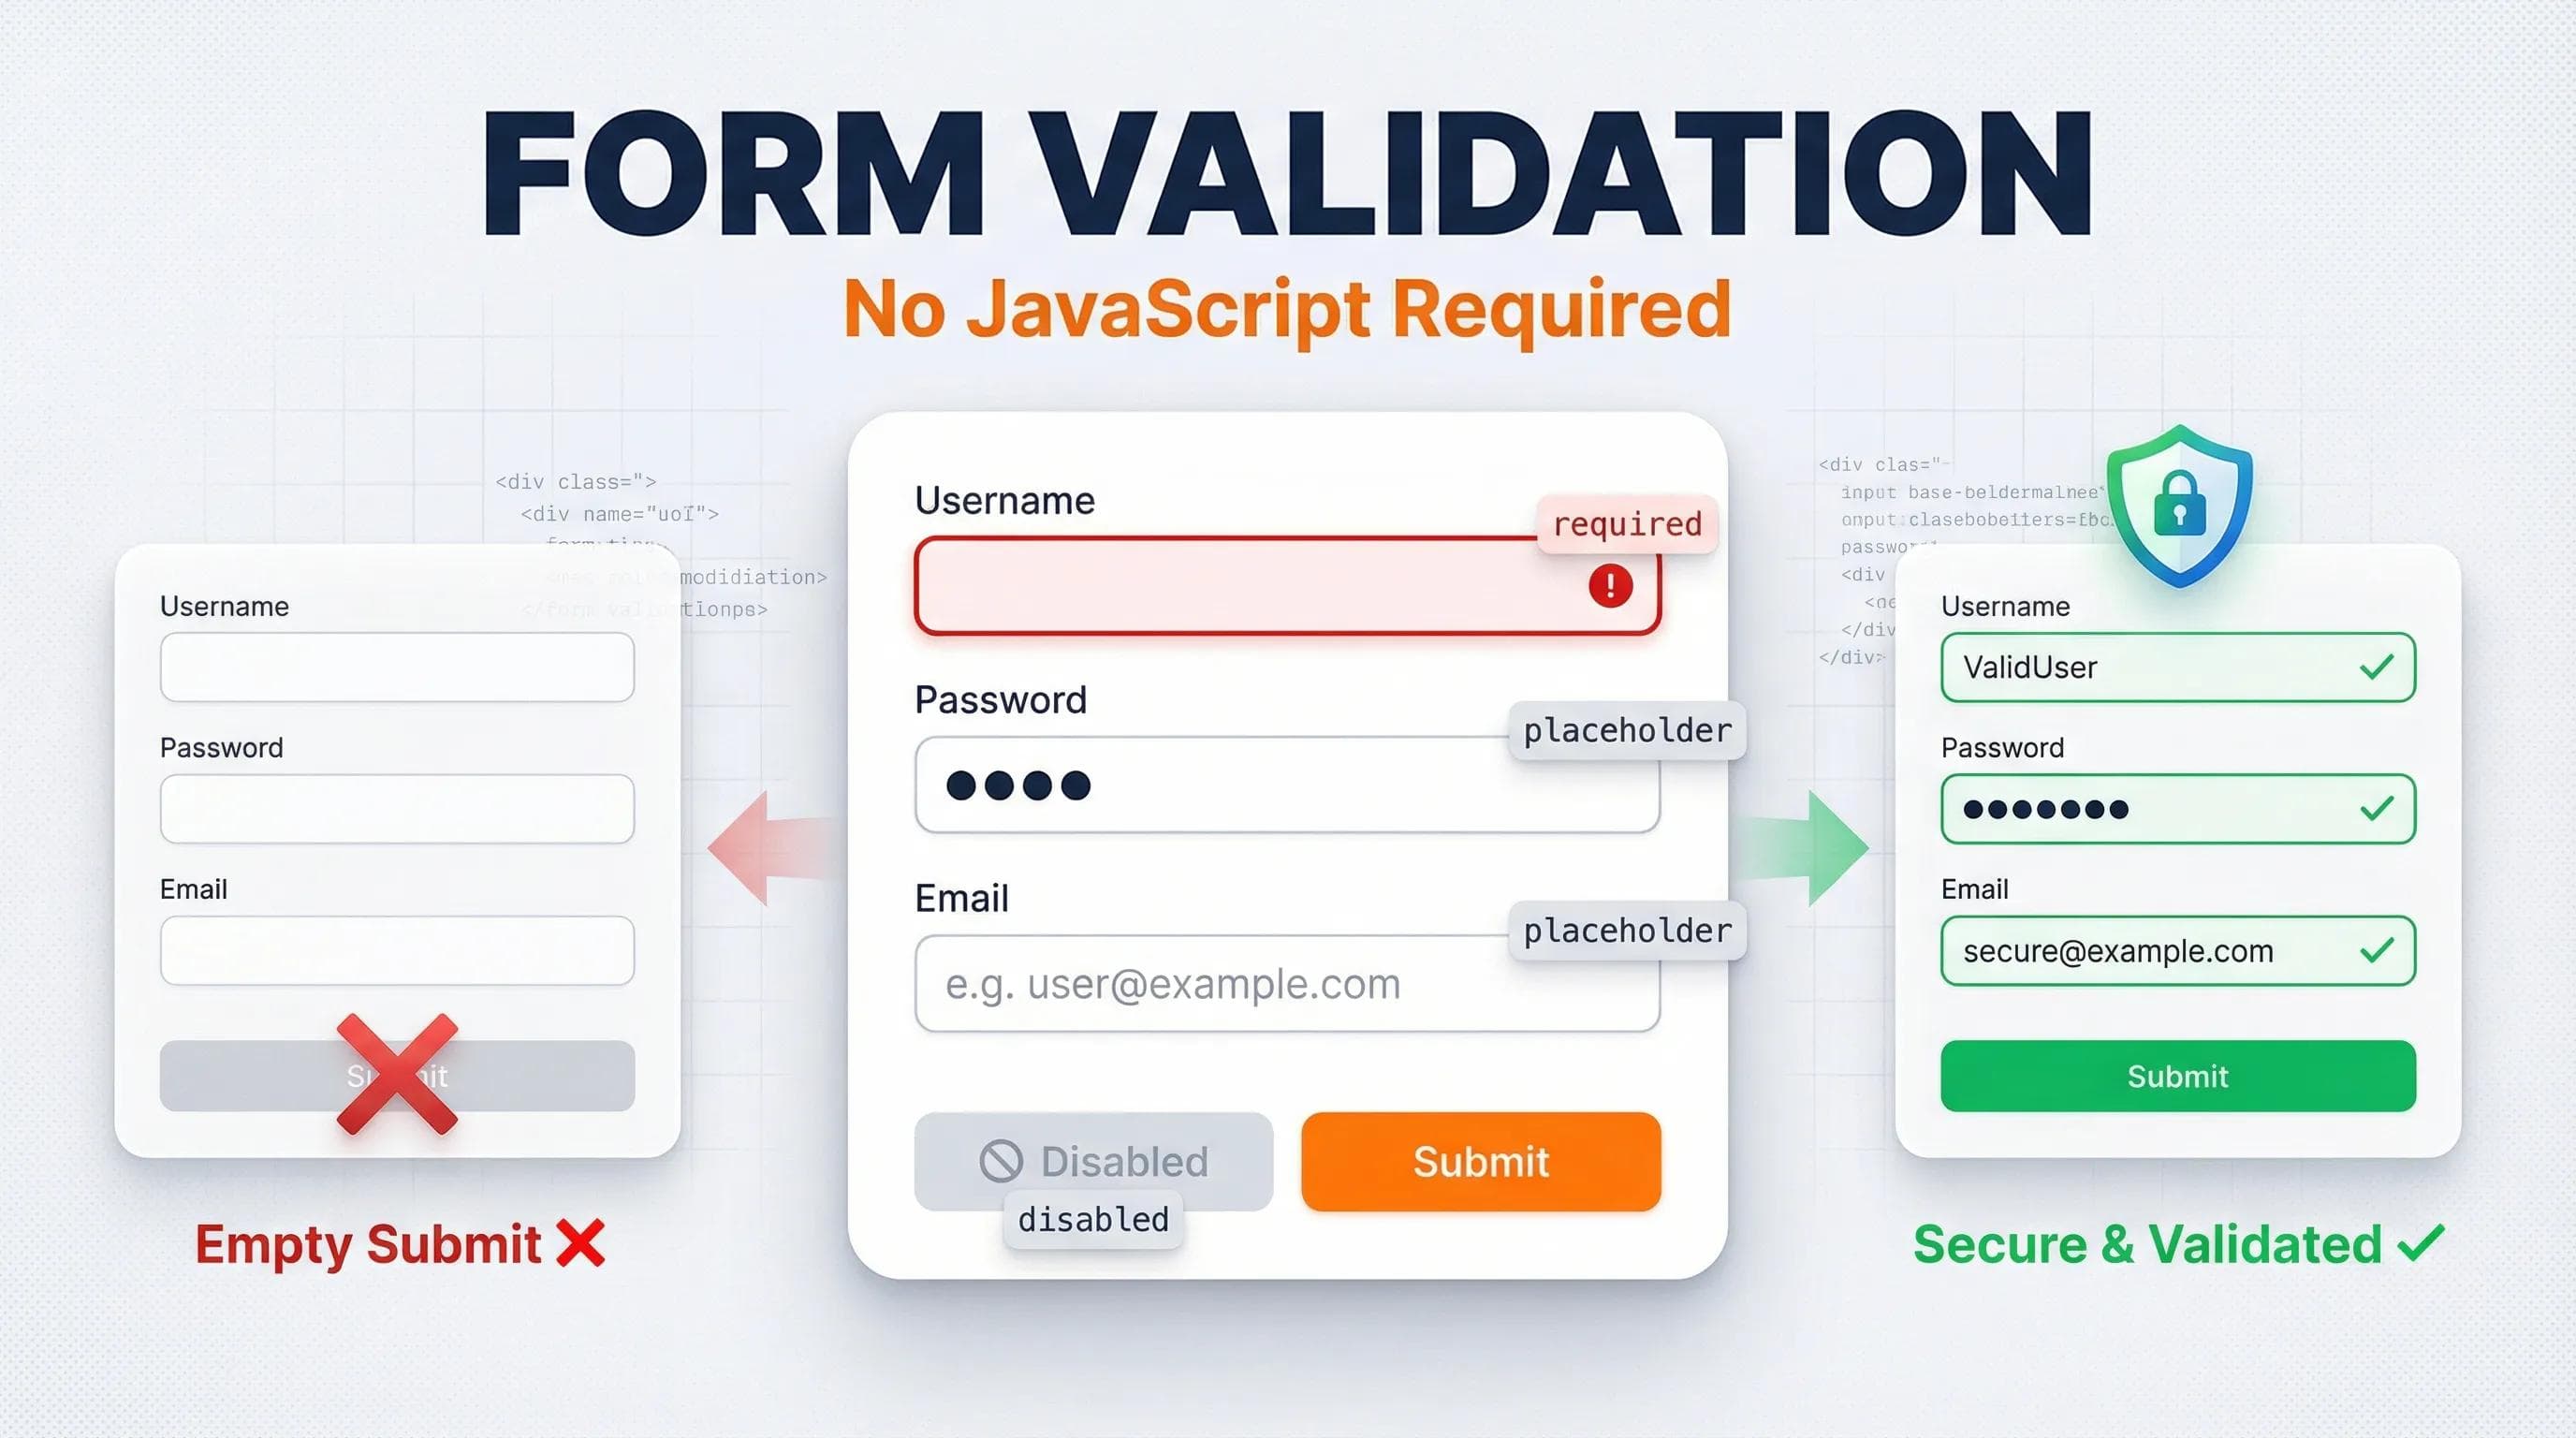
The "Empty Submit" Disaster
Imagine this scenario: A user visits your "Signup Page." They accidentally click the "Sign Up" button without typing a single word.

Result: Your website accepts the blank form. Your database gets filled with empty users. It is a disaster.
In the past, developers had to write complex JavaScript code to stop this. But today, HTML is powerful enough to stop bad data before it even leaves the browser.
In this blog, we will use Form Attributes to become the "Security Guard" of our website.
1. The Helper: placeholder (The Hint)
We used this briefly before, but let's define it properly. A
placeholder is the grey text inside the input box that gives the user a hint.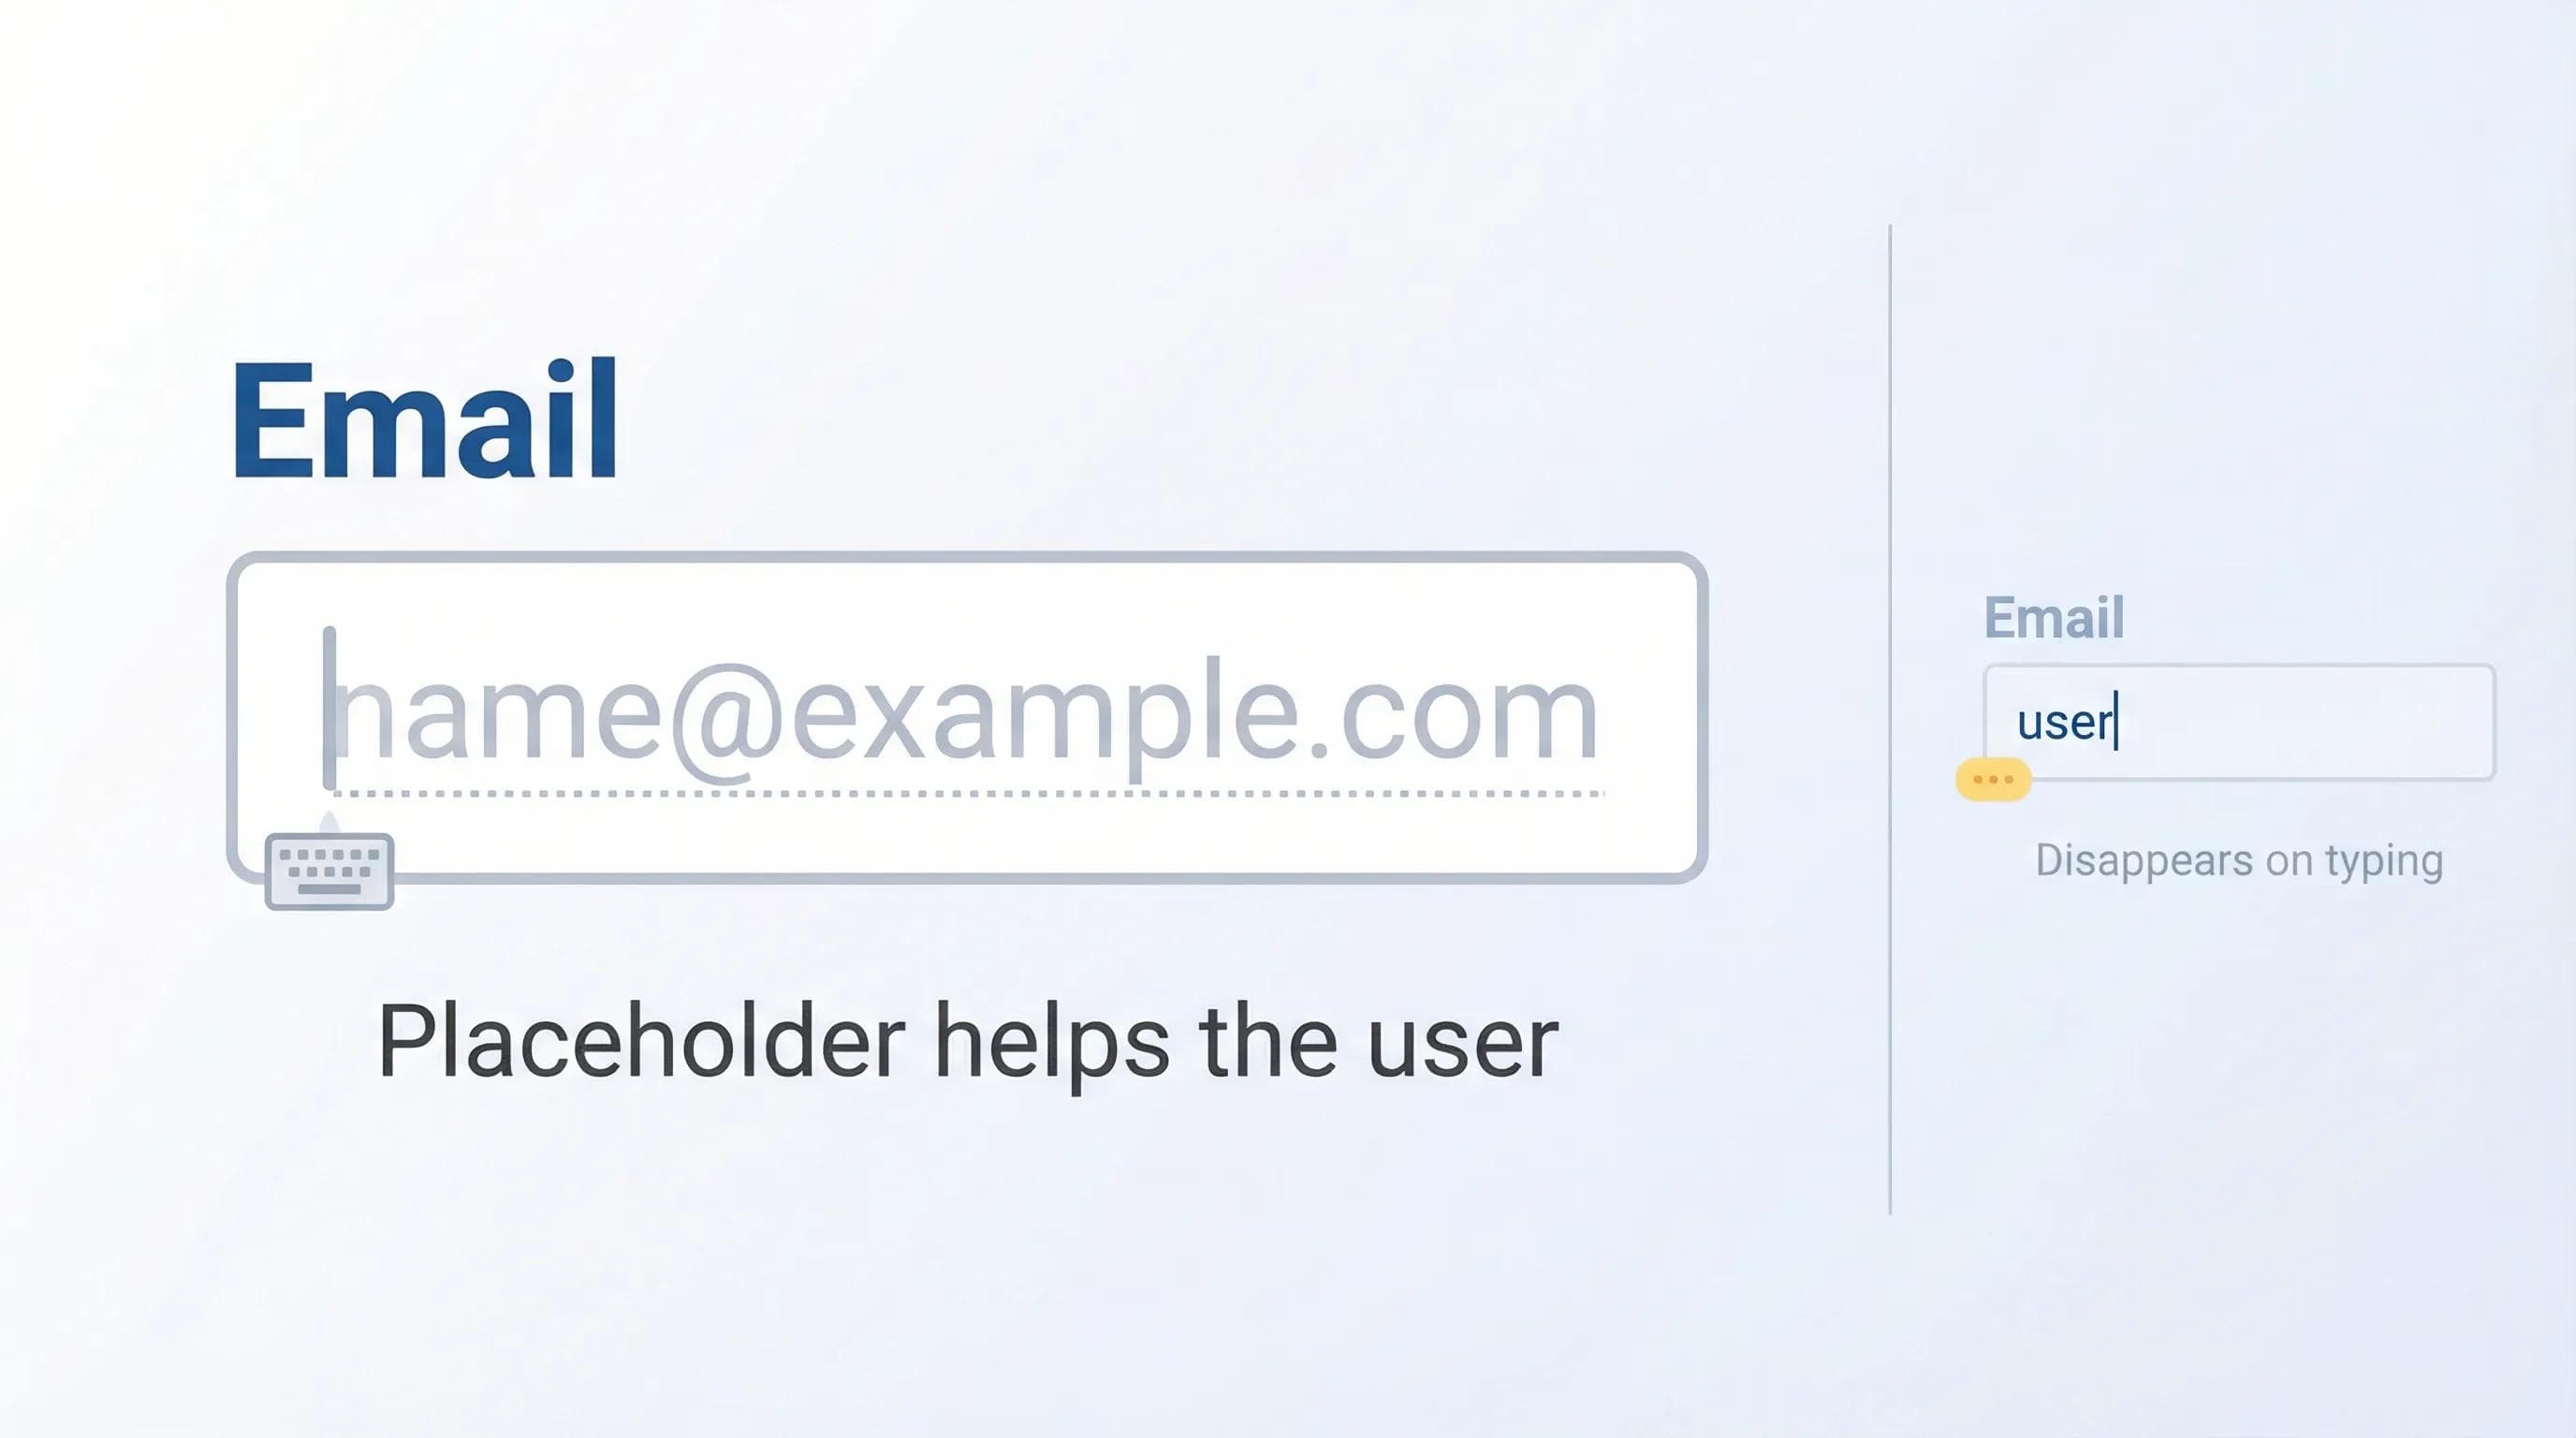
A placeholder is NOT a label.
- .When the user starts typing, the placeholder disappears.
- If you don't have a
<label>, the user will forget what they were supposed to type!
html
<label for="email">Email:</label>
<input type="email" id="email" placeholder="e.g. sunny@gmail.com">2. The Gatekeeper: required (The Stop Sign)
This is the most important attribute for data quality. By simply adding the word
required inside your input tag, you tell the browser: "Do not let the user submit this form if this box is empty."
If a user tries to skip it, the browser will block them automatically.
html
<input type="text" required>3. The Pre-Fill: value (The Default Data)
Sometimes, you want the form to already have data in it.
- Example: An "Edit Profile" page where your name is already written.
- Example: A "Subscribe" box that defaults to "Daily Newsletter".
We use the
value attribute for this.Difference between Placeholder vs. Value:
- Placeholder: Ghost text. Disappears when you click/type. (Not real data).
- Value: Real text. Stays there until you delete it. (Sent to the server).
html
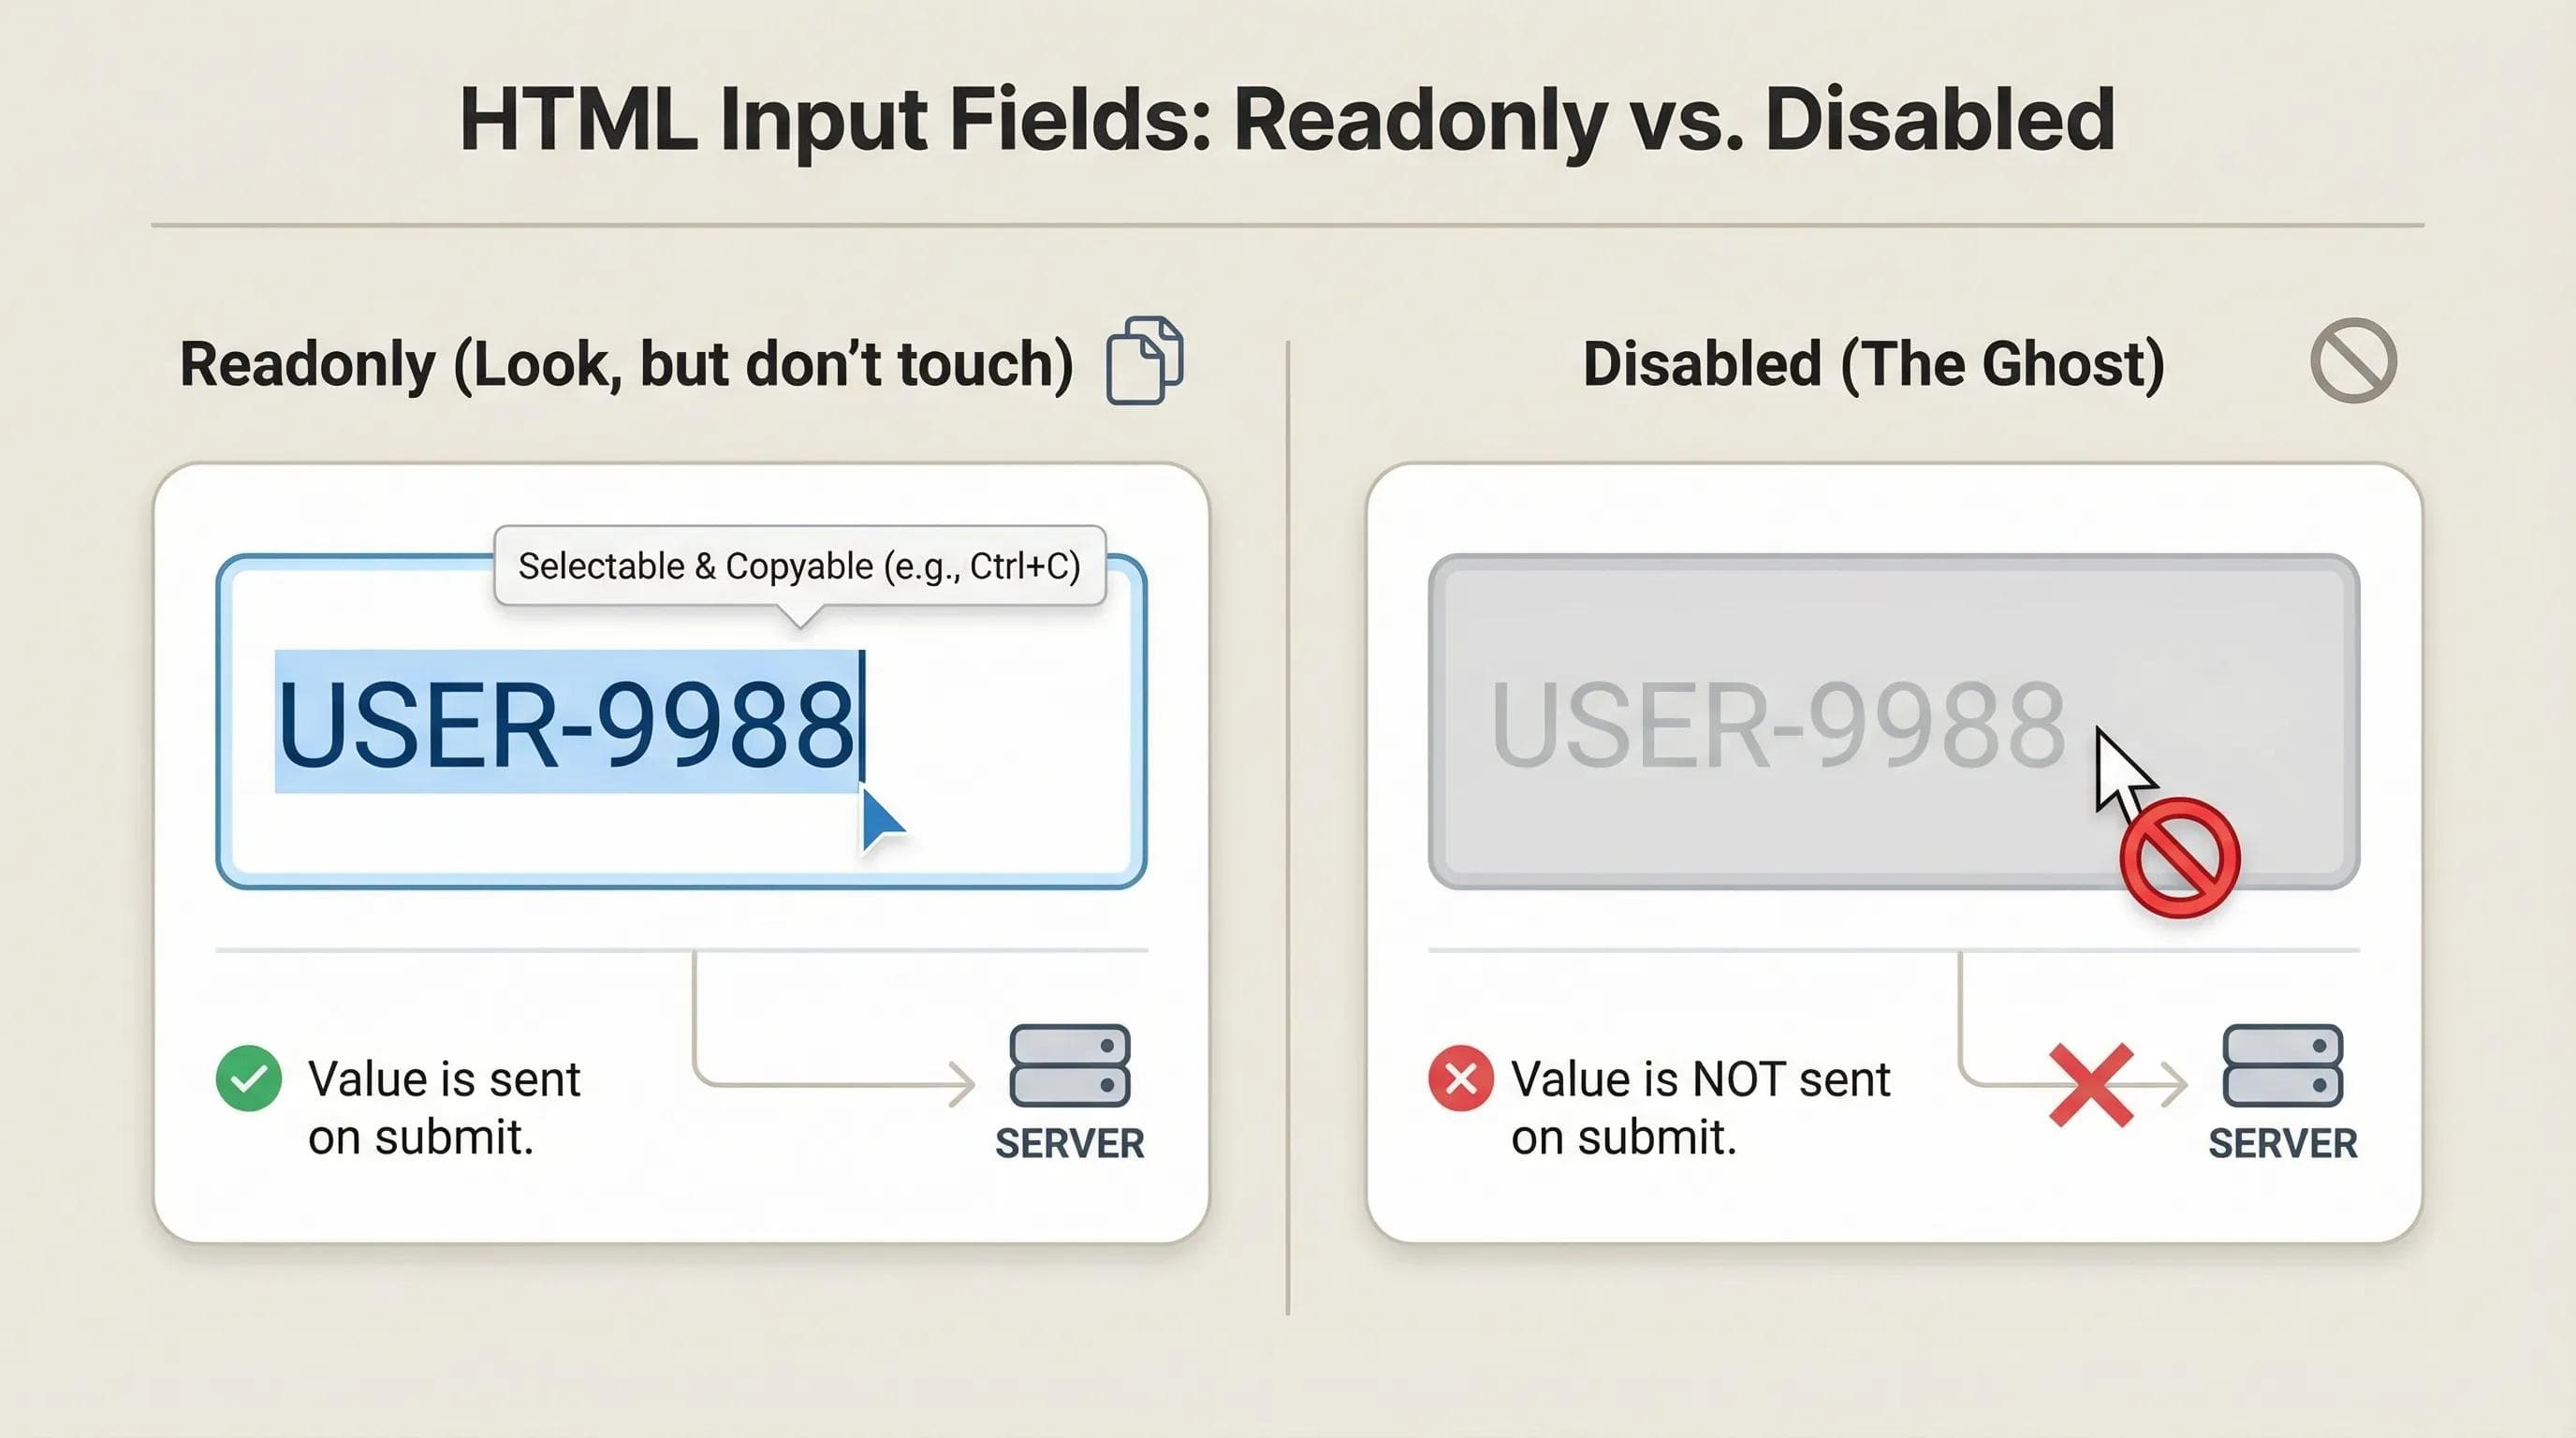
<input type="text" value="Sunny">4. The Showdown: readonly vs disabled
This is a classic Interview Question. Both attributes stop the user from changing the text. But they behave very differently.
The readonly Attribute (Look, but don't touch)
- The user cannot edit the text.
- The user can select/copy the text.
- CRITICAL: When the form is submitted, the data IS sent to the server.
The disabled Attribute (The Ghost)
- The user cannot edit.
- The user cannot click or select (it looks greyed out).
CRITICAL: When the form is submitted, the data is NOT sent to the server. It is treated as if it doesn't exist.
When to use which?
- Use
readonlyfor a User ID (User needs to see it, but can't change it). - Use
disabledfor a "Submit" button (until the user fills the form).
The AI Angle: autocomplete
Have you noticed how Chrome or AI Password Managers (like Google Passwords) automatically suggest your email and password?
They can only do this if you let them. The
autocomplete attribute helps AI understand your form.autocomplete="on": "Hey AI, feel free to help the user fill this." (Default).autocomplete="off": "No! Do not remember this." (Used for sensitive bank forms or CAPTCHAs).
html
<input type="password" name="password" autocomplete="new-password">6. Practical Task: The "Unbreakable" Login
Let's upgrade our
signup.html form to be professional and secure.Step 1: Open
signup.html. Step 2: Update your code with these new rules.
🛑 STOP! DO NOT COPY PASTE! Reading code is passive. Writing code is active learning. Type this out manually to understand whererequiredandreadonlygo.
html
<body>
    <h1>Create Account</h1>
<form>
    <div>
        <label for="uid">User ID (Auto-generated):</label>
        <input type="text" id="uid" value="USER-2026" readonly>
    </div>
    <br>

    <div>
        <label for="username">Username:</label>
        <input type="text" id="username" name="user" placeholder="Choose a unique name" required>
    </div>
    <br>

    <div>
        <label for="password">Password:</label>
        <input type="password" id="password" name="pass" required>
    </div>
    <br>

    <div>
        <label for="email">Email Address:</label>
        <input type="email" id="email" name="email" placeholder="example@gmail.com" required>
    </div>
    <br>

    <div>
        <label for="dob">Date of Birth:</label>
        <input type="date" id="dob" name="dob">
    </div>
    <br>

    <div>
        <p>Gender:</p>
        <input type="radio" id="m" name="gender" value="male">
        <label for="m">Male</label>

        <input type="radio" id="f" name="gender" value="female">
        <label for="f">Female</label>
    </div>
    <br>

    <div>
        <input type="checkbox" id="terms" name="terms" required>
        <label for="terms">I agree to Terms & Conditions</label>
    </div>
    <br>

    <button type="submit">Sign Up</button>
</form>

<hr>
<a href="index.html">Back to Home</a>
</body>
Step 3: Open Live Server.
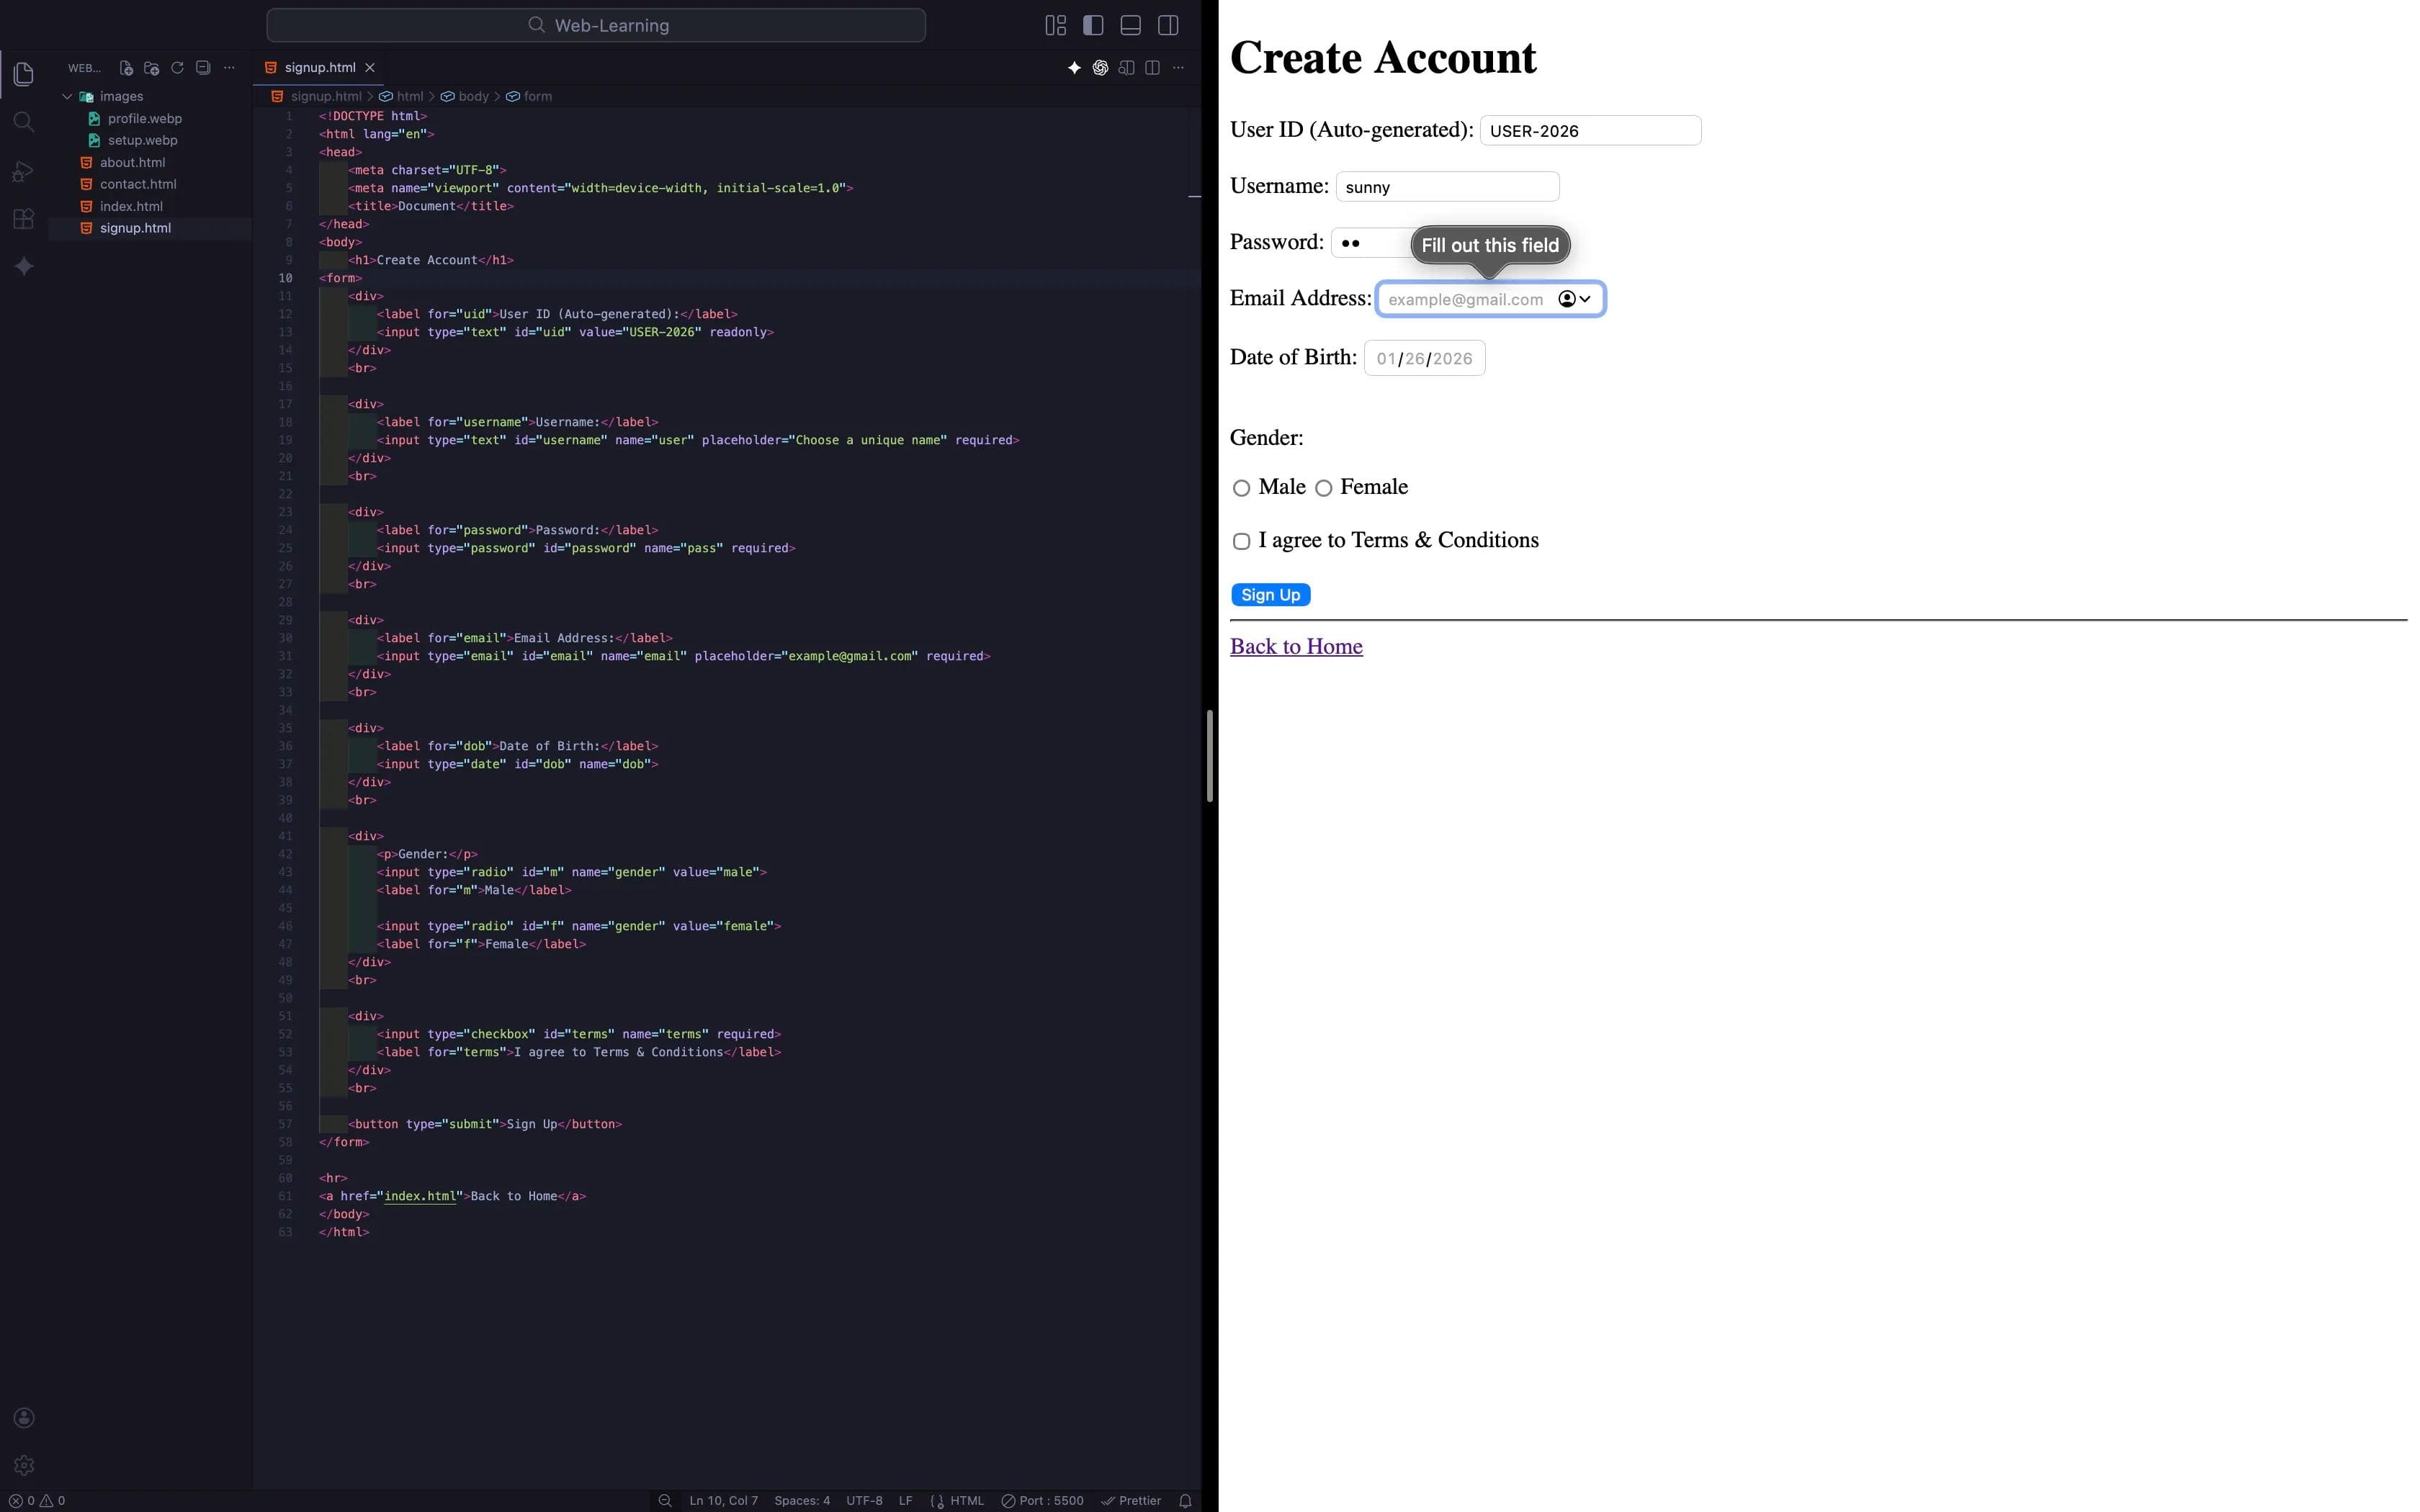
- Try clicking "Sign Up" without typing anything. (The browser should stop you!).
- Try deleting the "User ID". (You can't!).
- Click the "Disabled Button". (Nothing happens!).
Summary Table: The Attribute Cheat Sheet
| Attribute | Effect | Is Data Sent to Server? |
|---|---|---|
| placeholder | Shows a hint (Ghost text). | No |
| value | Sets default real text. | Yes |
| required | Stops submission if empty. | Yes |
| readonly | Locks text (cannot edit). | Yes |
| disabled | Kills input (cannot click/edit). | No (Server ignores it) |
Conclusion
Your forms are no longer just "boxes." They are now Smart Interfaces. They guide the user, prevent mistakes, and ensure you get clean data.
We have mastered Text, Links, Images, Lists, Tables, and Forms. Our website can handle almost any type of information.
Except one thing. The internet isn't just text and images anymore. It is Multimedia. What if you want to play a Song? What if you want to show a Video Trailer?
In the next blog, "Native Media: Audio & Video," we will learn how to embed media players directly into your website without relying on YouTube or Spotify. We will also learn why
autoplay is the enemy of User Experience.See you in the next post!
You can Read next part from here - READ NOW!
HTML Series: Your First Step in Modern Web Development (2026)
Step 13 of 22